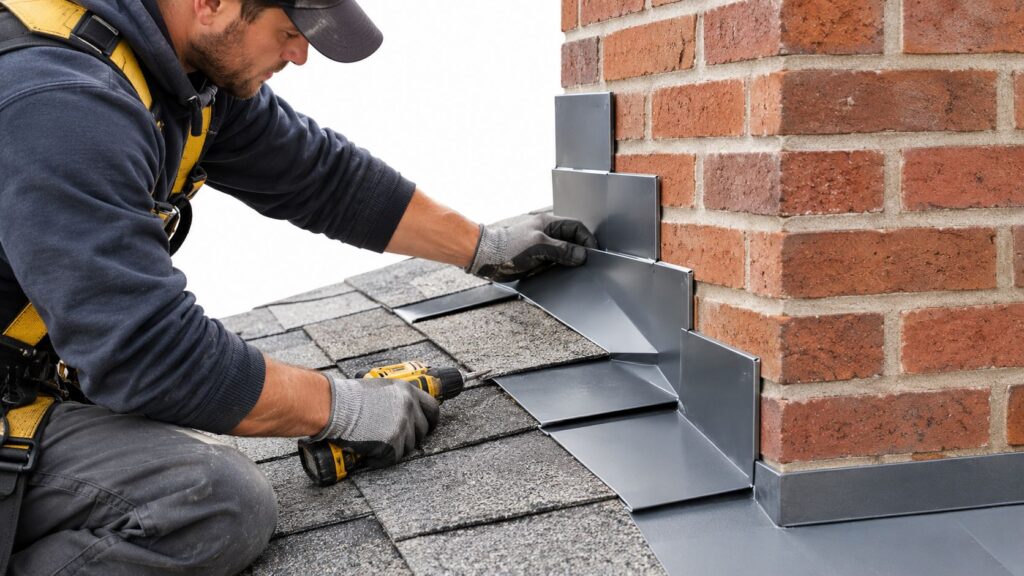
A corrugated roof can look clean from the ground and still leak at the first hard storm if the flashing was trimmed like flat stock and shoved into the ribs. That's the kind of callback that shows up in Fort Worth, Arlington, Mansfield, and the rest of the DFW Metroplex after a hot August stretch, when sealant lines have already been stressed by heat and wind-driven water is looking for every weak lap.
The fix is rarely exotic. It usually comes down to profile-matched flashing, compatible metals, the right fastener placement, and closures that seat in the corrugations instead of bridging over them. Roof flashing for corrugated roofing works when the trim follows the panel, the laps are detailed for movement, and the installer thinks about North Texas heat before the first screw goes in.
Table of Contents
- Why Corrugated Roof Flashing Trips Up Contractors in DFW
- Flashing Basics Every Installer Should Lock In First
- Choosing the Right Flashing Material and Profile
- Step-by-Step Installation That Actually Holds Water
- Handling Ridges, Troughs, and Wall Transitions
- Thermal Movement, Dissimilar Metals, and Wind-Driven Rain
- Field-Tested Tips and Your Pre-Job Checklist
Why Corrugated Roof Flashing Trips Up Contractors in DFW
The same call keeps coming back from jobs in Tarrant County, Crowley, North Richland Hills, and Keller. The roof looks fine until the first storm, then a sidewall, a rake, or a vent boot starts staining because the flashing was cut flat against a rib profile instead of stepped to match the panel. On corrugated metal, flat stock looks neat for about a minute, then it leaves voids where water and wind can get to work.
The failure mode is usually geometry, not drama
Corrugated panels are forgiving when water runs straight off the roof. They're much less forgiving where a wall, ridge, valley, or pipe interrupts that flow. If the flashing doesn't match the profile, water gets driven into open valleys, sealant bridges crack, and the first movement cycle opens a path. That's why the old habit of “just add more caulk” creates more callbacks than it solves.
Practical rule: if the trim doesn't sit on the ribs and close the troughs the way the panel does, it's not finished, it's pretending.
DFW makes this worse because heat stretches metal and then cool nights pull it back. A flashing that looked tight at 7 a.m. can be working against itself by late afternoon, especially on long runs in Fort Worth, Benbrook, White Settlement, and Weatherford. The result is usually not a dramatic blowout, just a slow leak that shows up around the drywall or along the siding.
What this guide keeps focused on
The details that prevent callbacks are the ones crews can control before the last course goes on. That means profile-matched flashing, the right gauge, smart fastener placement, and closure strips that fill the voids at ribs and troughs instead of relying on sealant alone. It also means ordering trim with the panel system in mind, not treating corrugated roofing like a place to save money on random coil stock.
For job planning, the underlayment tie-in matters too, especially where ice and water protection is used at vulnerable transitions. A practical reference point for those details is the ice and water shield guidance, because the edge treatment and flashing sequence need to work together, not fight each other.
Flashing Basics Every Installer Should Lock In First
The first mistake on a corrugated roof is usually a language mistake. If the order desk and the crew are not calling out the same panel style, trim profile, and finish, the flashing that shows up won't fit the roof that's on the deck. That's where exposed-fastener trim, concealed-fastener trim, and the actual corrugation profile start to matter.
Know the terms before you cut anything
A sidewall flashing handles the roof where it meets a vertical wall. A headwall flashing works at the upper termination where water wants to run uphill against the detail. A valley flashing handles the channel where two roof planes meet, and a kick-out flashing is the diverter that sends water into the gutter instead of behind the wall. The International Residential Code requires metal flashing to be corrosion resistant and at least 0.019 inch (0.483 mm), equivalent to No. 26 galvanized steel, and the IRC first required kick-out flashing in 2009 Professional Roofing.
Corrugated systems also need flashings shaped to the panel profile. Flat trim that might pass on another roof style can leave open gaps at the ridges and valleys of a corrugated panel, and that's where water finds the weak point. If you're ordering material for a reroof in Fort Worth, Haltom City, or Saginaw, the roof shape has to drive the trim shape.
The minimums that keep you out of trouble
For a corrugated assembly, the slope, lap direction, and wall transition details all matter before the first piece of trim is fastened. The panel and the flashing should be matched in gauge and finish, because the trim has to move with the roof without splitting or oil-canning. When the detail is at a wall, the kick-out has to kick water out, not just sit there looking complete from the driveway.
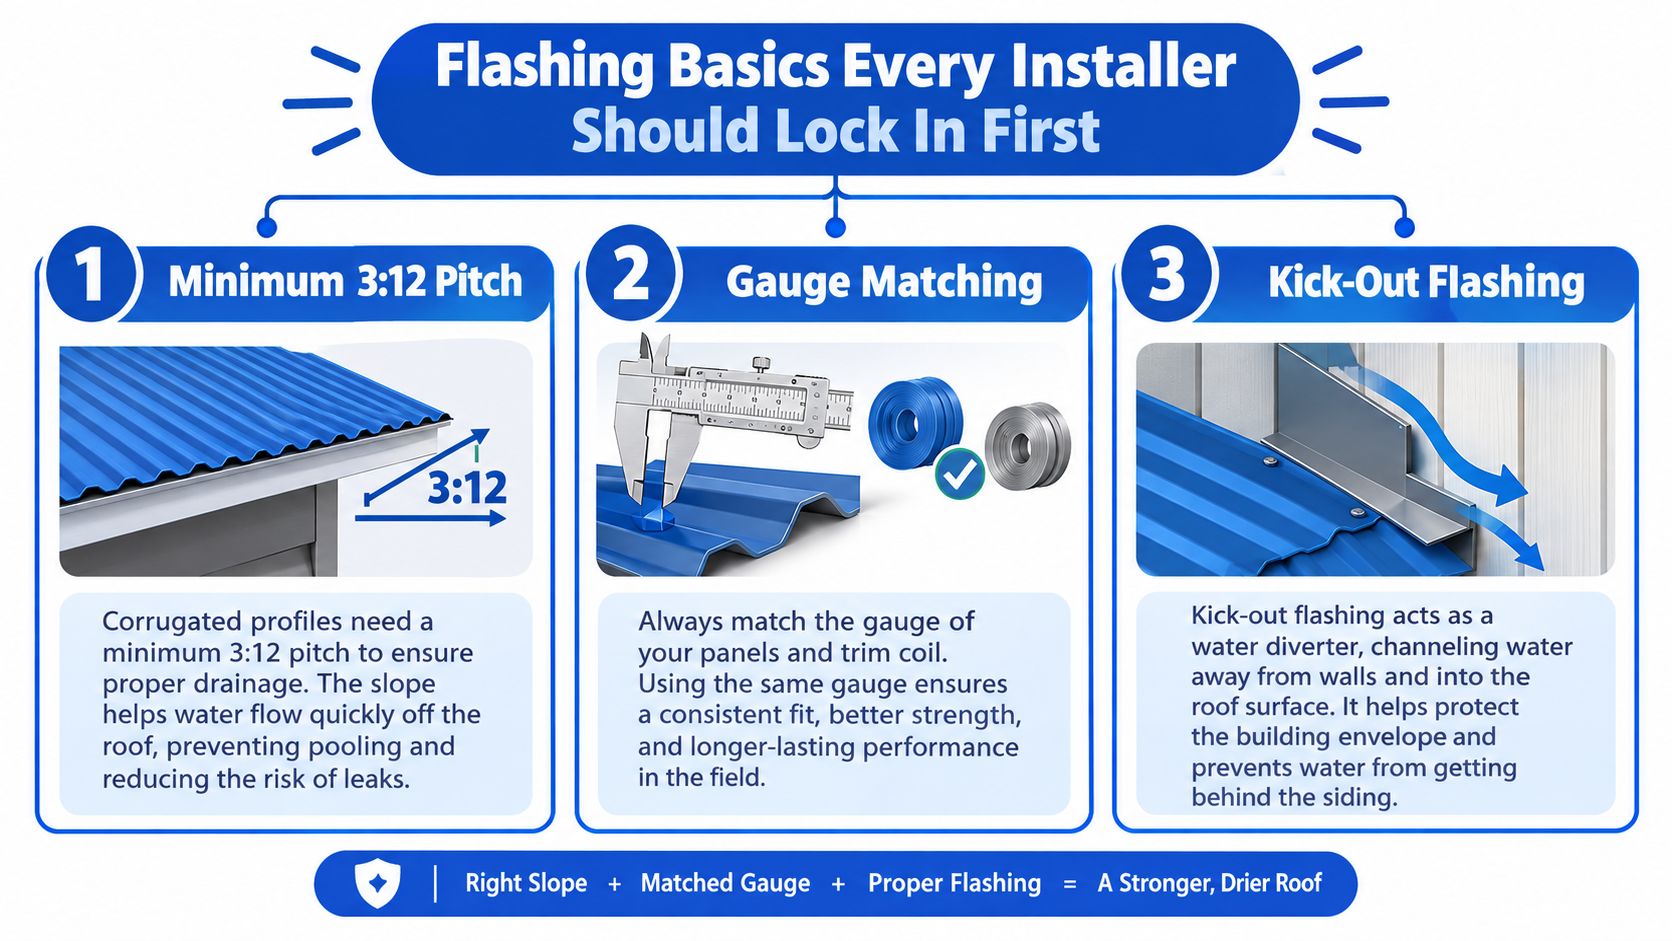
The other baseline rule is simple. If the flashing belongs to the roof, it should be compatible with the roof. That means matching material, matching gauge, and matching finish, not just grabbing whatever trim coil happens to be on the rack. For related underlayment tie-ins and edge protection, the standing seam and accessory material reference is a useful reminder that trim systems are built as systems, not loose parts.
Choosing the Right Flashing Material and Profile
A roof can look right from the ground and still fail at the flashing if the material choice is loose. In DFW, heat, sudden storms, dust, and seasonal swing all punish trim that was picked just because it was on the shelf. The flashing has to fit the panel, handle movement, and hold up in the same conditions as the roof around it.
Match the metal to the roof, not the cheapest coil
For corrugated roofs, galvanized steel is still common, but coating level matters. G-90 gives more protection than a lighter galvanized option, while Galvalume AZ-55 is often a solid fit where finish life and corrosion resistance both matter. Painted aluminum .032 works where low weight and corrosion resistance matter more than stiffness, and copper sits in its own category as a premium material that needs careful separation from other metals.
Dissimilar metal contact is where a lot of callbacks start. Flashing should not touch a dissimilar metal without a real isolation strategy, and that matters even more when the roof ties into treated lumber or mixed accessory metals. If the flashing is going around ACQ-treated framing, the material choice needs to be deliberate, not casual.
| Flashing Material | Best Panel Match | DFW Climate Rating | Dissimilar Metal Risk |
|---|---|---|---|
| Galvanized Steel | Corrugated steel panels | Good when coating and finish match | Moderate, if mixed with other metals |
| Galvalume AZ-55 | Corrugated steel or Galvalume panels | Strong in roof systems that want longer finish life | Moderate, avoid contact with incompatible metals |
| Painted Aluminum .032 | Aluminum-compatible assemblies | Strong for corrosion resistance, softer in handling | Higher if paired with incompatible metals |
| Copper | Specialty assemblies only | Durable, but niche | High if not isolated correctly |
Profile matters as much as material
A trim profile that sits well on an R-panel will not behave the same way on tighter corrugation. The ribs control how closure strips fit, how much hem you can form at the edge, and how long the step or transition piece needs to be before it clears the high points. That is why the roof profile has to be part of the order, not something the crew sorts out after the truck is unloaded.
One option contractors use for supply is Blue Lake Roofing Supply, where the point is having matching flashing components on hand rather than piecing together trim from mismatched stock. On corrugated roofs, that compatibility matters more than a low sticker price on random coil.
For related trim and accessory fit, the standing seam metal roofing materials reference is a useful reminder that trim systems work as systems, not loose parts.
Step-by-Step Installation That Actually Holds Water
The sequence matters more than the tool brand. If the laps are wrong, the closure strips are loose, or the fasteners bite too shallow, the roof will remind you fast. A good corrugated detail starts with fit and ends with consistent fastening, not with a tube of sealant trying to rescue a bad layout.
Dry-fit before you commit
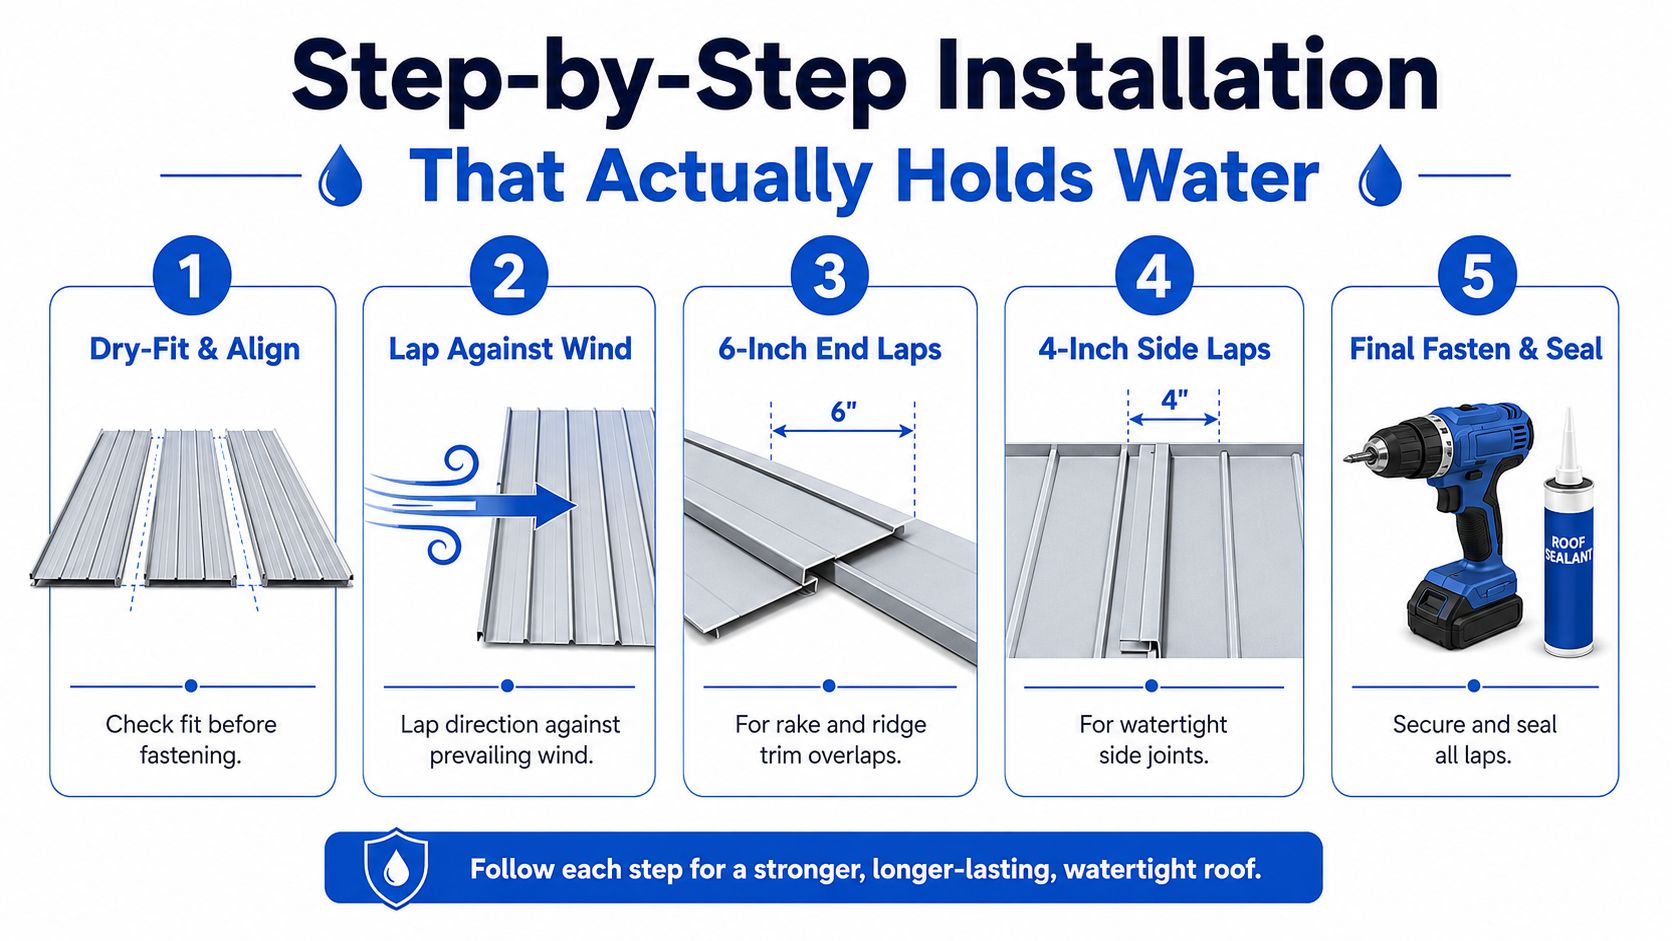
Lay the flashing in place before any screws go in. Check the lap direction against the prevailing wind, seat the closure strips, and make sure the trim rides the ribs instead of bridging them. On the roof edge, 6-inch end laps on rake and ridge trim give the crew a workable overlap, while 4-inch side laps need butyl tape compressed to visible squeeze-out so the joint isn't just pretending to be sealed.
The screw pattern matters just as much. Keep trim laps at 8 inches on center, and intermediate purlins at 12 inches on center. That spacing gives the flashing enough support to stay seated without over-clamping the panel or crushing the washer stack.
Field rule: if the washer is flattened hard or the screw head is buried, the fastener is too tight. If the flashing can still move, it's too loose.
Penetrations need discipline
Pipe boots and vent stacks are where installers get tempted to improvise. Don't. Seat the boot on the corrugation profile, fasten it in the high ribs, and keep the sealant where the termination needs it, not smeared across every seam. For penetrations wider than 18 inches, use a cricket so water has somewhere to go besides the back side of the flashing.
A sidewall detail should go in a fixed order, and that order matters. Start with the soffit pan, then install the wall counter-flashing, then finish with the panel-side trim. Reversing that order is how crews end up trapping water behind the wall line in places like Fort Worth, Hurst, or Mansfield, where wind can drive rain sideways under a detail that looked fine from the ground.
Handling Ridges, Troughs, and Wall Transitions
The places where corrugated roofs get complicated are predictable. Ridges, valleys, and walls each force the flashing to do something different, and that's where hand-cut shortcuts start failing. If the closure doesn't match the geometry, the water path doesn't care how neat the bead of sealant looks.
Ridges and troughs need matched closures
A ridge cap on a corrugated profile has to bridge the top of the panel without leaving open voids under the ribs. Universal closures and a foam backer rod do a better job than hand-cut shims because they conform to the rib shape. That matters on profiles like 7/8-inch ribbed caps over a more aggressive corrugation, where a generic cap can look installed while still leaving room for wind to work underneath.
Valleys are a different problem because water speed increases there. The valley pan has to be wide enough to control that flow, the edges need hemmed stiffness, and the centerline needs the right crimp so the pan doesn't telegraph movement through the joint. A flat, loose valley on a corrugated roof becomes a collection point for debris and a bad place for the first leak to show up.
Wall transitions demand the right kind of flashings
At a wall, the question is whether the detail needs reglet-counter-flashing or a surface-mount Z-flashing. Stucco and brick often want a more integrated counter-flash, while lap siding usually accepts a cleaner surface-mount approach when the trim is properly cut to the profile. The important part is not the label, it's the fit.
Water doesn't care that a flashing is custom-made if the closure is wrong.
Each transition should get its own closure profile, not a universal assumption. If the roof is in a neighborhood like Benbrook, Lake Worth, or North Richland Hills, where storms can drive water hard against the wall line, the safest setup is the one that closes the profile and leaves the least room for lift at the edge.
Thermal Movement, Dissimilar Metals, and Wind-Driven Rain
Most bad flashing details don't fail on day one. They fail after the roof has been hot, cold, wet, and windy enough times that the hidden mistakes show up. In North Texas, that usually means six to eighteen months after install, when the crew has already moved on and the customer is calling about a stain.
Movement is the first thing to respect
Metal moves. If the flashing is locked too rigidly, the trim has nowhere to go when the roof expands and contracts through a long hot season. The fix is simple in concept, but easy to skip in the field, use slotted holes where the detail needs movement, and separate the fixed and sliding points so the trim isn't fighting itself every afternoon.
Mixed metals create corrosion problems fast
Copper against bare galvanized steel is a bad marriage. Lead, pressure-treated lumber in direct contact, and other incompatible pairings can create the same kind of problem, just by a different path. The answer is to match substrates where possible and isolate them where you can't, because corrosion doesn't need a big opening, it only needs contact and time.
Wind pushes water where gravity won't
Wind-driven rain is why a lap that looks fine in calm weather still leaks in a storm. Water can travel uphill through a lap when the pressure is right, so the detail has to rely on butyl tape in every side lap, a 2-inch end-lap overlap, and a bead of sealant at the joint where it belongs. More sealant smeared across the whole lap usually just hides the problem.
| Callback Causes vs. Detailing Fixes | ||
|---|---|---|
| Failure Mode | Root Cause | Preventive Detail |
| Thermal stress cracking | Trim locked too rigidly | Slotted holes and fixed-versus-sliding securement |
| Galvanic corrosion | Dissimilar metals in contact | Match metals or isolate them |
| Wind-driven leak at lap | Capillary action and uplift | Butyl tape, correct overlap, targeted sealant |
The best current installation guidance on flexible laps and movement acknowledges that tight, over-sealed joints are not always the durable ones. Some details need room to breathe, especially on bigger spans in hotter markets like DFW where the roof is working all day.
Field-Tested Tips and Your Pre-Job Checklist
The fastest way to avoid a flashing callback is to stage the job like the roof is already trying to fail. That means checking the trim package before any cut, not after the crew has already locked in the first piece. It also means pulling the matching accessories from the same supplier so the finish, gauge, and system components all live in the same family.
What to verify before the first cut
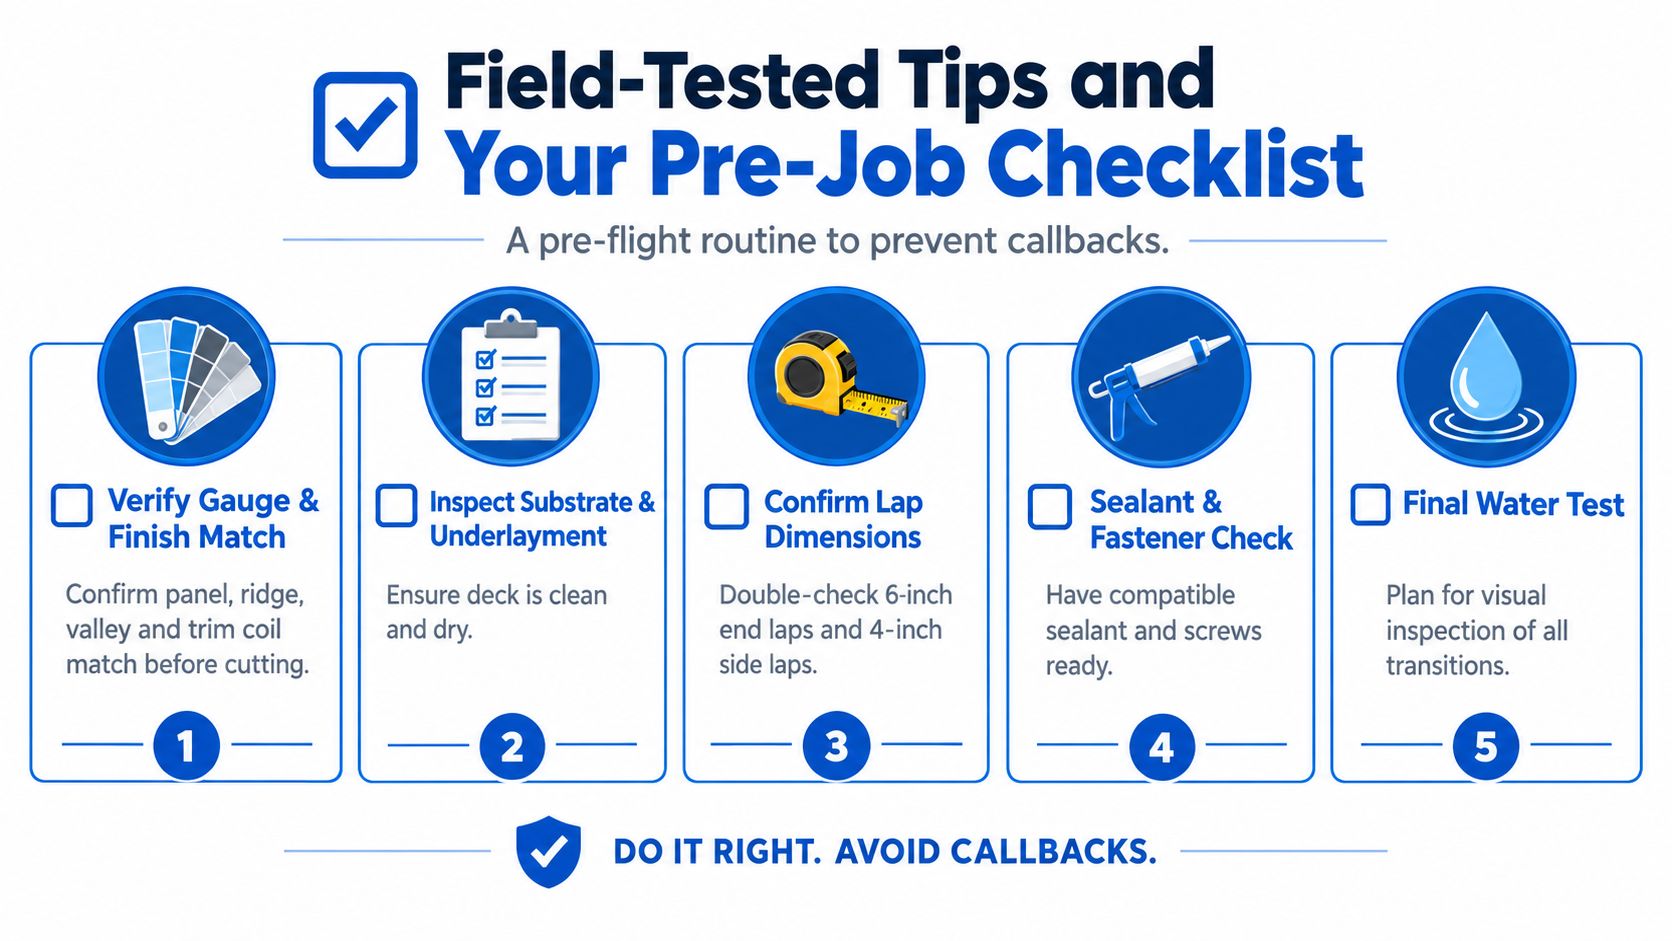
- Gauge and finish match: Check that the field panels, ridge, valley, and trim coil all match before anyone starts cutting. A small mismatch in finish or coating is what turns into visible fade lines later.
- Closures at every rib: Dry-fit the foam or profile-matched closures and confirm they compress without being crushed flat. If they don't seat cleanly, the trim won't either.
- Fastener landing points: Stage butyl tape and stitch screws so the fastener lands in the high rib, not the trough. That's the difference between a secure joint and a leak path.
- Kick-out length: Measure the diverter against the gutter edge, not against the wall, so the water lands where it should.
- Termination sealant only: Keep a tube of color-matched urethane sealant for terminations, not for every seam on the roof.
A good habit is to chalk the overlap line before sealing and pre-drill valley pans so the screws align cleanly. I also like to photograph every transition before the next course covers it, because that picture becomes the easiest way to prove what was done if a question comes up later in Fort Worth, Burleson, or Grand Prairie.
For crews sourcing material in the Metroplex, the point is to get the closures, pipe boots, Z-bar, and matching trim coil from one yard whenever possible. The contractor tips page is a practical place to keep that mindset, because a single source makes it easier to keep the paint system consistent and avoid the common mismatch problem that shows up after installation.
If you're sourcing roof flashing for corrugated roofing in Fort Worth, Arlington, or anywhere across DFW, Blue Lake Roofing Supply can help with matching trim, closures, and jobsite-ready roofing components. Visit Blue Lake Roofing Supply to line up the flashing system before the roof goes on, so your crew can spend less time patching details and more time closing clean jobs.