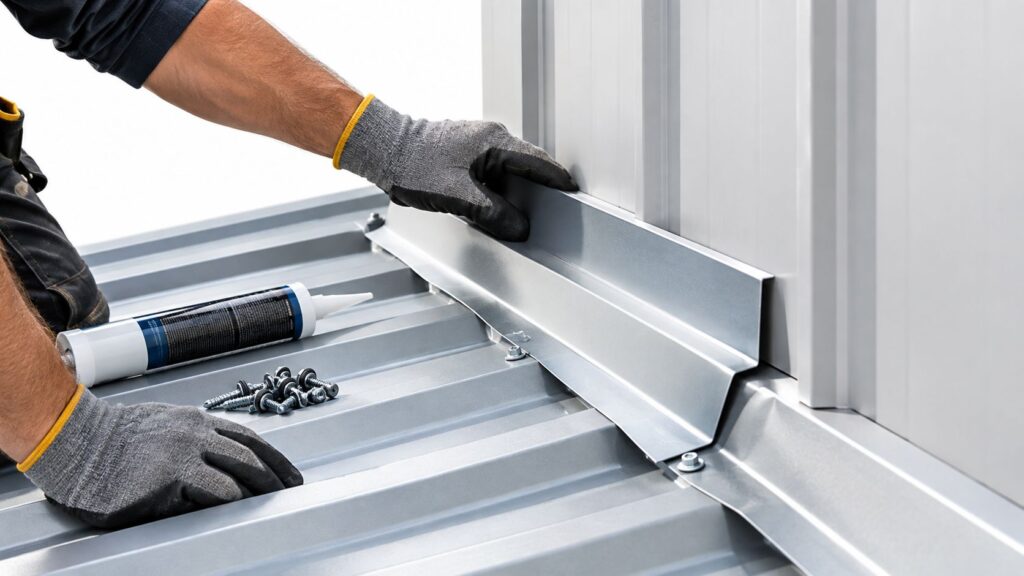
You're probably staring at a pallet of fiber cement, a schedule that's already tight, and a homeowner who wants the place buttoned up before the weather turns. In the DFW market, that usually means one thing, the job doesn't fail at the last board, it fails because the material sat wet, the wall wasn't prepped right, or the crew rushed the details that inspectors and callbacks always catch later.
How to install fiber cement siding in Fort Worth, Arlington, Forest Hill, Mansfield, and the surrounding cities starts before the first cut. The crews that stay profitable treat it as a system, not a product, because moisture control, dust control, fastener placement, and code clearances all have to work together.
Table of Contents
- Staging and Jobsite Readiness for Fiber Cement
- Sheathing and Weather Barrier Code Compliance
- Precision Cutting and Fastening Techniques
- Flashing and Trim Integration for Moisture Control
- Finishing Details and Common Installation Mistakes
- Streamlining Material Sourcing for DFW Contractors
Staging and Jobsite Readiness for Fiber Cement
A lot of siding problems start on the ground, not on the wall. A pallet gets dropped in the wrong spot, a thunderstorm rolls through North Texas, and the crew grabs boards that have already taken on water. That's where the shrinkage and butt-end issues begin, and it's why wet-product handling matters more than most basic install guides admit, especially on jobs in Fort Worth, Bedford, North Richland Hills, Hurst, and the nearby suburbs.
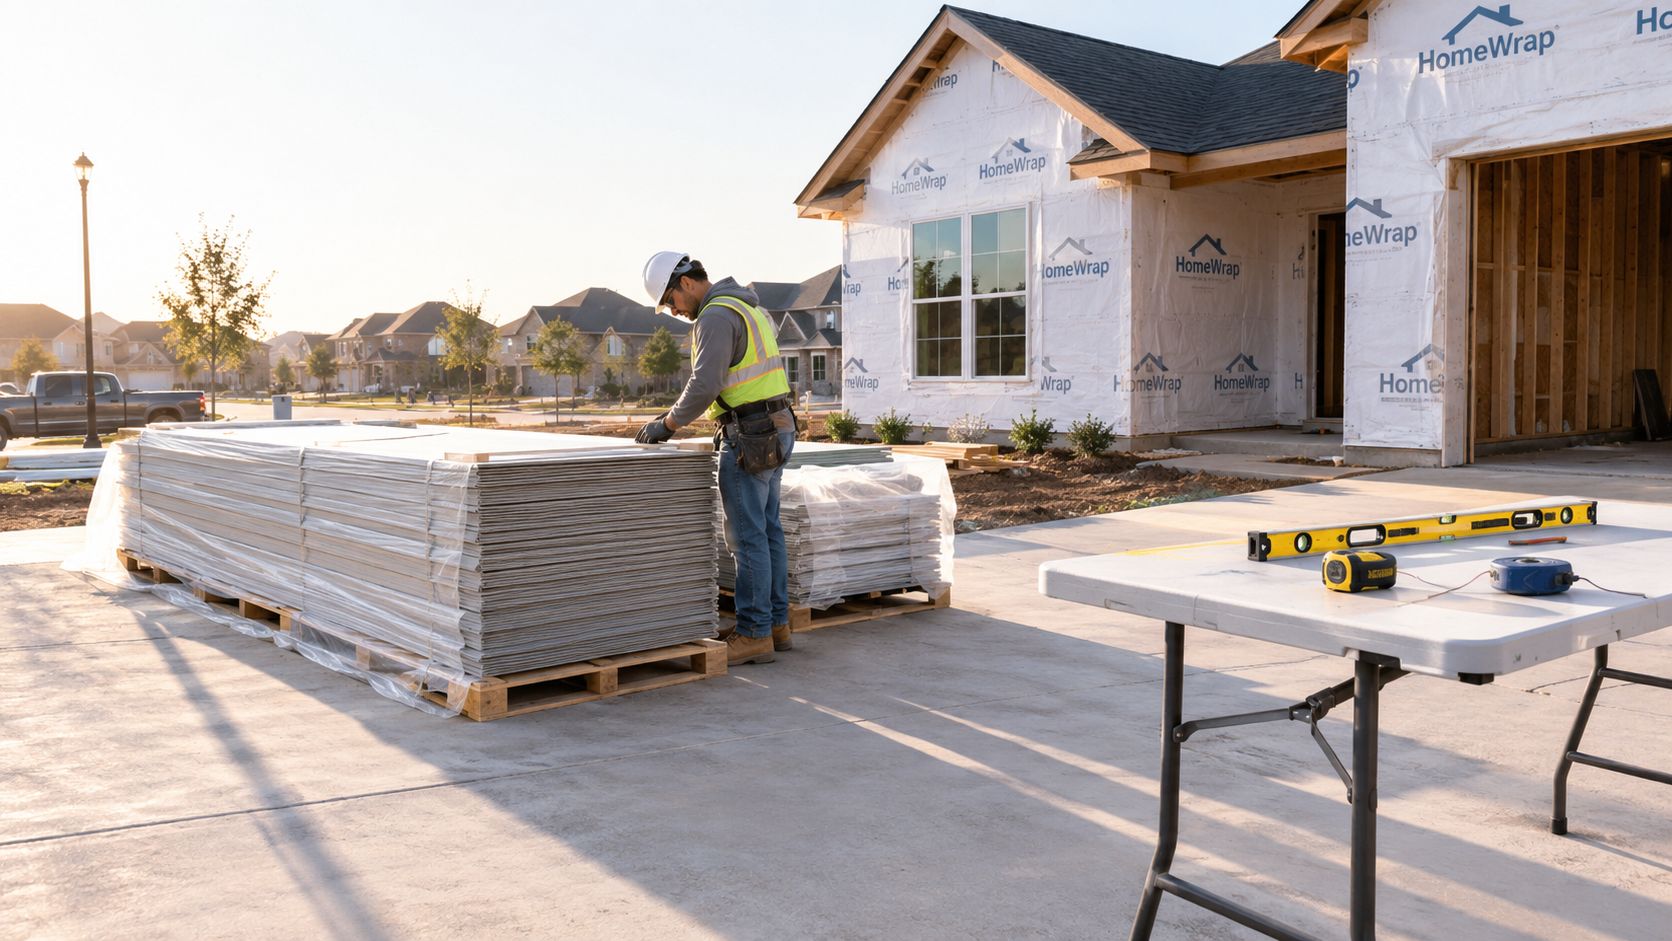
Inspect the delivery before it becomes a problem
Practical rule: if a board arrived wet or saturated, don't turn installation into a rescue mission. Reject compromised material, keep it covered, and reset the schedule before the wall work starts.
The smartest staging move is simple. Check the bundles as soon as they land, keep them off bare soil, and store them where runoff can't wick into the stock. If boards are already damp, the safer move is to let them dry out and replace anything that's visibly damaged rather than forcing the crew to make up for a bad delivery.
That matters because fiber cement is unforgiving about sequencing. When a crew installs saturated product and then locks it into trim and joints, the board movement shows up later at the butt ends, and the whole wall looks sloppy even if the nail lines were straight. The earlier you spot the issue, the less likely you are to waste labor tearing back completed courses.
Stage for speed, not just protection
Good staging isn't just about keeping water off the material. It's about keeping the crew moving without boxing them into a narrow path or forcing unnecessary lifts through mud, landscaping, or tight side yards. On DFW remodels, that can mean a clean laydown area near the driveway, protected from sprinkler spray and morning dew, with the day's cut list close enough to keep production steady.
If you need coordinated exterior materials, a local siding and roofing yard can help reduce those dead hours. On mixed-scope jobs, I've seen crews pair siding pickups with other exterior items from a local guttering supplier network so the jobsite stays stocked without extra trips across town.
Sheathing and Weather Barrier Code Compliance
A siding replacement can look complete from the driveway while water is already entering at the wall edges. On Fort Worth jobs, the failure usually starts with uneven sheathing, gaps in the weather-resistive barrier, or flashing that was installed out of sequence. The city adopted the 2021 International Code Council codes effective April 1, 2022 Fort Worth Development Services, so crews should verify current local requirements rather than rely on older installation habits.
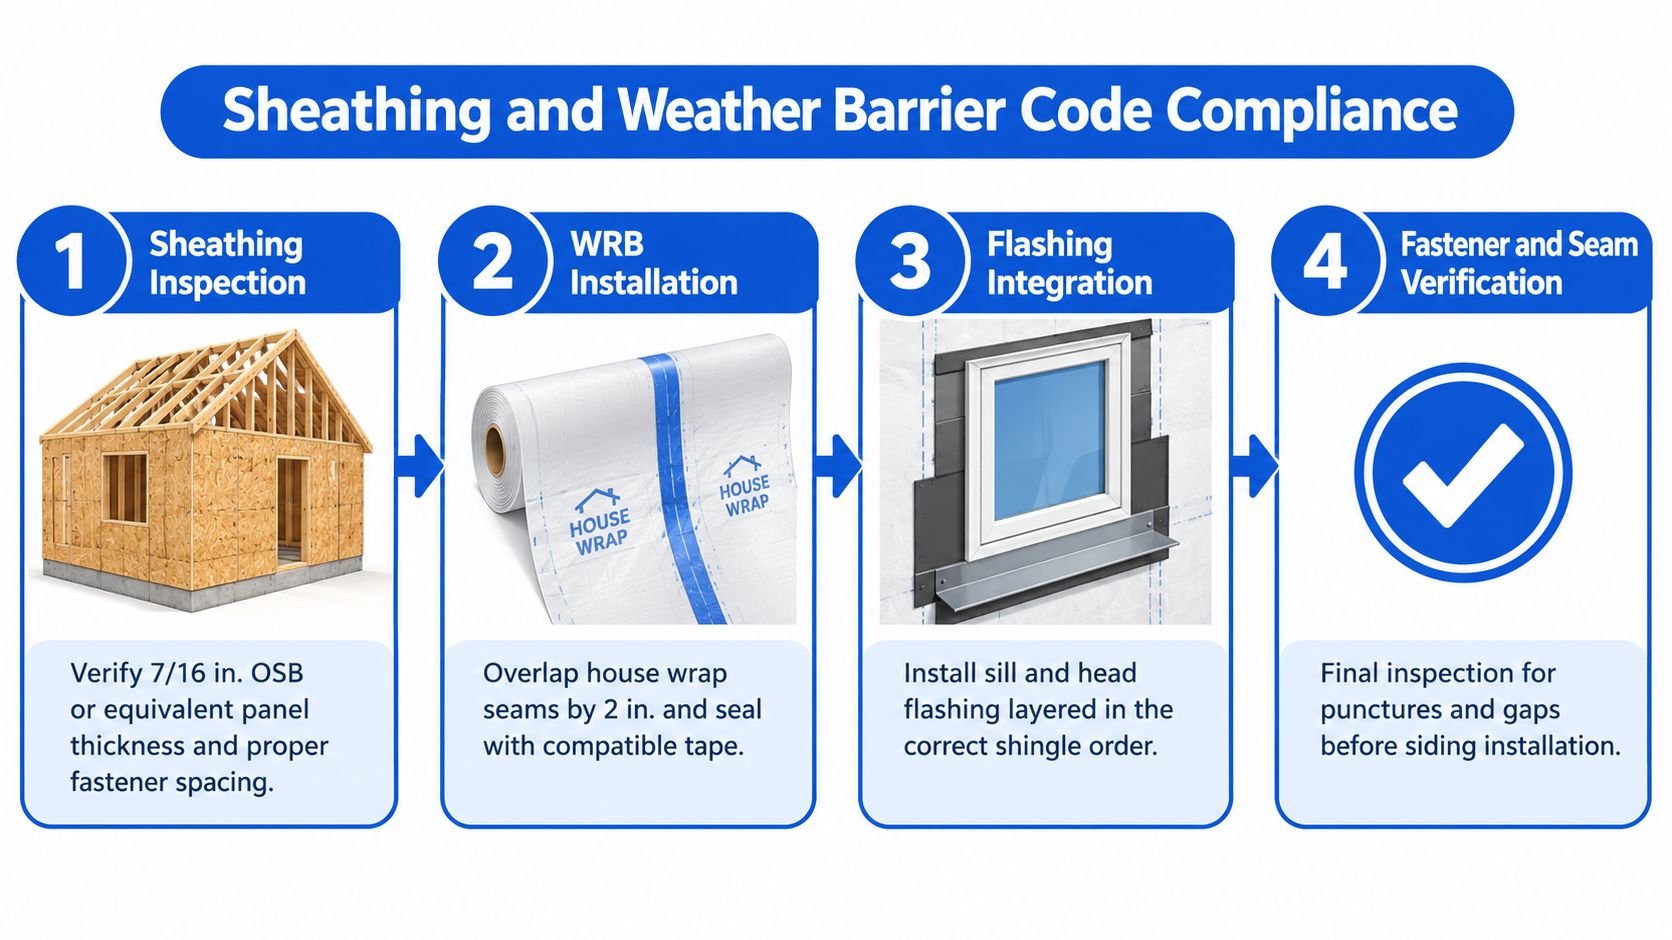
Build the drainage plane first
The substrate must be flat, sound, and dry enough to receive the siding system. Check for damaged or swollen sheathing before covering it. Then install continuous weather-resistive barrier coverage, seal penetrations, and integrate the barrier with window and door flashing so water has a clear path down and out.
Independent code-evaluation guidance calls for a minimum 6-inch clearance between the siding and earth and a 2-inch clearance between fiber-cement siding and horizontal concrete slabs or similar weather-exposed surfaces QAI field guide. These gaps limit splashback and capillary moisture. In DFW, slab edges, sprinkler overspray, and heavy rain can keep a low wall wet long after the weather clears.
Dust control also matters before the barrier is covered. Remove loose silica-producing debris from the work area with suitable collection methods rather than blowing it across the wall or into occupied spaces. A clean substrate makes defects easier to find and keeps the drainage plane from being compromised during installation.
Protect the wall at openings
A properly installed WRB cannot correct a failed window or door transition. Flashing must direct water onto the WRB, and the siding must stop with enough clearance around the opening to avoid bridging moisture into the wall. Keep trim, sealants, and drainage paths coordinated instead of allowing each trade to finish its own edge independently.
On DFW jobs, I'd rather slow the crew for a clean opening detail than spend a week answering a callback after the first hard rain.
Fort Worth's residential guidance states that replacing missing or decayed siding requires a building permit Fort Worth residential permit guidance. Treat the work as an exterior wall repair when the substrate or barrier is compromised. A surface replacement can hide rot, open drainage paths, and leave the same leak in place.
Keep the clearance rules visible
Use a field check before the first course is installed:
- Ground clearance: keep siding above grade, with 6 inches minimum required by the code-evaluation guidance.
- Slab clearance: keep fiber cement 2 inches above horizontal concrete surfaces.
- Water management: confirm that flashing, WRB, trim, and siding form one continuous drainage assembly.
Precision Cutting and Fastening Techniques
On a Fort Worth remodel, the cutting station can affect both crew output and compliance. Fiber cement is heavy, brittle at the edges, and produces hazardous silica dust when cut. A circular saw running without extraction can spread dust through an occupied home or across a tight Arlington lot. Set up a controlled cutting area, use the specified blade, and keep dust from migrating into living spaces. The sequence matters because every cracked board creates another cut, cleanup task, and opportunity for water to reach the wall.

Cut for control, not for noise
Use dust collection, carbide blades, and score-and-snap methods where the product allows them. Manufacturer FAQ guidance identifies dust-collection saws and score-and-snap techniques as appropriate modern practices for limiting exposure and keeping occupied homes cleaner Nichiha FAQ. Confirm the product's cutting instructions before changing tools, since a method that works for one board profile may damage another.
A careful pass is usually faster than a rushed one. Crews lose time when a rough cut forces a replacement, spreads dust into finished areas, or requires repeated cleanup. On larger elevations, organize the cutting station so one worker can measure and mark while another cuts, without carrying loose boards through the house.
Fasten into structure, not guesswork
For horizontal lap siding, start with the starter strip and install each course in sequence. Drive corrosion-resistant nails into studs, typically about 1 inch from the top edge and at least 3/8 inch from board ends. Leave 1/8-inch gaps at butt joints and 1/4-inch clearance at corners so the boards can move without crushing their edges Allura lap siding install guidance.
Fasteners should be hot-dipped galvanized or stainless steel, installed perpendicular to the face, and set without overdriving. Where metal framing is used, screws should penetrate at least 1/4 inch or three threads into the framing Allura installation manual. Check stud locations before the first course, especially on remodels where framing may not align with the old siding layout. A fastener that misses structure can loosen, telegraph a defect, or leave the board vulnerable to wind movement.
Fort Worth crews also need to keep the installation aligned with the locally applicable 2021 ICC code requirements. Product instructions, approved fastener schedules, and the permitted wall assembly must agree before production begins. Do not substitute a fastening pattern just because it worked on another elevation.
Pre-drill where the board is fragile
Field rule: if a fastener is close to an edge or a cutout has a fragile shape, pre-drill it. The extra motion prevents a cracked panel and a return trip.
Installation summaries call for fasteners to penetrate solid wood by 1 to 1-1/4 inches. They also require pre-drilling within 1/4 inch of an edge or near fragile shapes to prevent cracking InspectApedia installation summary. Mark these locations before lifting the board into place. That small preparation step protects the face, keeps the fastening line consistent, and reduces failures after Fort Worth temperature swings.
Flashing and Trim Integration for Moisture Control
A siding wall can look straight and dry while water is already entering at a roof, window, door, deck, or corner transition. Those junctions deserve more attention than the open field because trim, flashing, and fasteners all have to accommodate movement while directing water out of the assembly. Caulk supports the detail. It cannot replace the detail.
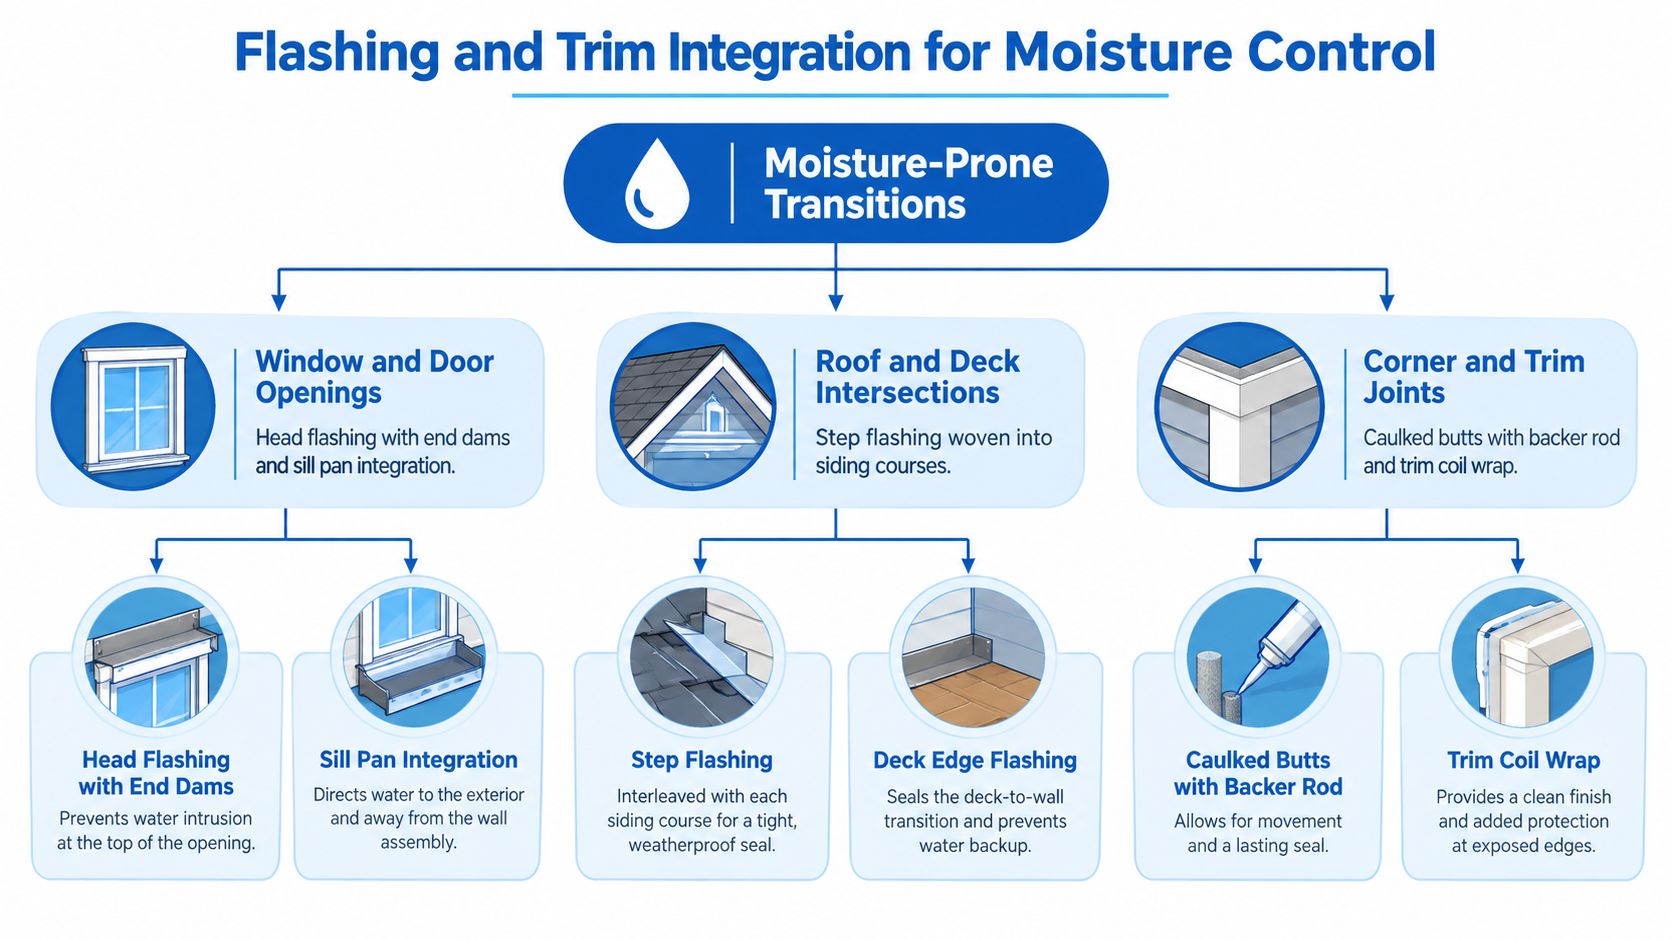
Build each transition around the water path
Leave a 1/8-inch gap at board ends and trim, then seal joints with paintable 100% acrylic latex caulk according to standard installation guidance. The gap gives fiber cement room to respond to heat and moisture changes. The sealant closes the joint while allowing the assembly to move instead of forcing stress into the board edge.
Keep the gap consistent. Boards pushed tight against trim can buckle, split, or transfer movement into the caulk bead. Before sealing, remove dust from the cut edge and confirm the joint is dry. Silica dust from cutting can contaminate the bead and reduce adhesion, so crews should cut in a controlled area, use suitable respiratory protection, and collect dust with effective vacuum equipment rather than blowing it across the wall.
Sequence flashing before trim
At a roof-to-wall junction, water needs a clear path onto the exterior surface and away from the sheathing. Roof edges, deck connections, window heads, and door openings require the same discipline. Review roof flashing against a wall before installing trim so each layer overlaps the one below it.
Fort Worth crews should also compare these transition details with the locally applicable 2021 ICC code requirements, the approved wall assembly, and the product instructions before production begins. A trim profile that works on one elevation may conceal an unacceptable drainage or flashing sequence on another.
Water gets redirected first, trimmed second, and sealed last. Reversing that order leaves caulk carrying a load it was never designed to handle.
Keep the detail inspectable
Use clean laps, solid support where trim needs it, and openings that do not block drainage behind decorative pieces. Leave enough access for a future repair without dismantling an entire elevation. On DFW homes, strong sun, wind-driven rain, and seasonal moisture make simple transition details easier to inspect and more reliable over time.
Finishing Details and Common Installation Mistakes
A fiber cement wall can look finished and still be waiting to fail. On Fort Worth jobs, the usual warning signs are damaged board faces, open joints, trapped moisture, and paint applied before the substrate is ready. Heat, strong sun, wind-driven rain, and storm cycles expose those shortcuts quickly, creating callbacks long after the crew leaves.
Let the finish follow the installation
One installation guide estimates a full install can take 10 to 12 days, with painting adding about five more days, so a typical project may run two weeks or longer Forbes Home installation guide. The exact schedule depends on crew size, weather, delivery condition, and the amount of trim work, but the trade-off is clear. Rushing paint or installing wet boards can trap moisture behind the finish.
Factory-primed boards still need careful storage and handling. Keep pieces supported, protect cut edges as required by the product instructions, and do not close up a wall before the assembly is dry. If rain reaches exposed cuts or the delivery arrives damp, give the material and wall time to dry before sealing and painting.
Control dust and protect the finish
Cutting fiber cement creates respirable silica dust. Use the manufacturer-approved cutting method, dust collection or wet control where appropriate, and suitable respiratory protection. Keep the cutting station away from open windows, occupied areas, and fresh paint. A clean station also prevents abrasive dust from settling into wet coatings and joints.
The final inspection should catch small defects before they become moisture paths:
- Wrong fastener choice: use the corrosion-resistant fastener specified for the product and wall assembly.
- Overdriving nails: excessive force crushes the board face and reduces holding strength.
- Insufficient clearance: the siding needs room above grade and around slab conditions, as detailed in the sheathing and clearance guidance above.
- Tight joints with no movement gap: follow the product requirements so seasonal movement does not crack the joint or distort the board.
- Unsealed cut edges: treat exposed cuts according to the manufacturer's instructions, especially at penetrations and trim transitions.
A clean-looking wall that ignores clearances can become a service call after the first weather cycle.
Check the work before closeout
Caulk is part of a moisture-control strategy, not a repair for poor layout, blocked drainage, or boards forced into place. Before closeout, check joint width, fastener seating, cut-edge treatment, coating coverage, and the approved wall assembly against the locally applicable 2021 ICC code requirements and product instructions. That final check protects the finish and gives the crew a clear record for inspection.
Crew discipline at the cutting station and fastening line keeps the wall flat, dry, and ready for paint. On Fort Worth, Mansfield, Keller, and nearby DFW projects, that standard protects both the homeowner and the contractor's margin.
Streamlining Material Sourcing for DFW Contractors
A siding crew loses money every time it waits on a missing trim piece, a short fastener count, or a delayed drop that pushes the install into tomorrow. That's why sourcing matters as much as labor planning. If your supplier can stock fiber cement, trim, soffit, and the fastening accessories together, the job stays moving and the estimate stays real.
Blue Lake Roofing Supply's siding supply page is one local option for contractors who want fiber cement and related exterior materials dispatched from Forest Hill into the DFW market. Their jobsite-direct delivery model and trade-account setup fit the way siding work runs, especially when a crew is moving between Fort Worth, Arlington, Mansfield, and other nearby cities.
Keep the job off the truck and on the wall
Centralized sourcing works because it reduces the number of stops between planning and production. When the siding, trim, and fasteners come from one yard, the crew spends less time solving inventory gaps and more time installing the wall correctly. That matters most on remodels, where one missing accessory can stall several people.
Trade accounts also help align purchases with the billing cycle, which is useful on multi-phase exterior jobs. Contractors already manage labor, weather, and inspection timing, so material logistics shouldn't become another moving target.
Use the supplier as part of the schedule
A supplier with same-day fulfillment on orders placed by noon can keep a mid-day stoppage from turning into a lost day. That's not a luxury on DFW jobs, it's a practical way to protect margin when a delivery issue or a surprise field condition slows the crew.
For contractors working across Fort Worth and the surrounding metroplex, the core value is consistency. The fewer places you need to source a siding package, the easier it is to keep your crew stocked, your wall details complete, and your schedule intact.
If you're lining up a fiber cement project in Fort Worth, Arlington, Mansfield, or anywhere in the DFW metroplex, Blue Lake Roofing Supply can help you source siding, trim, and related exterior materials from a local yard with jobsite delivery. Visit Blue Lake Roofing Supply to line up materials that match the way your crew works.