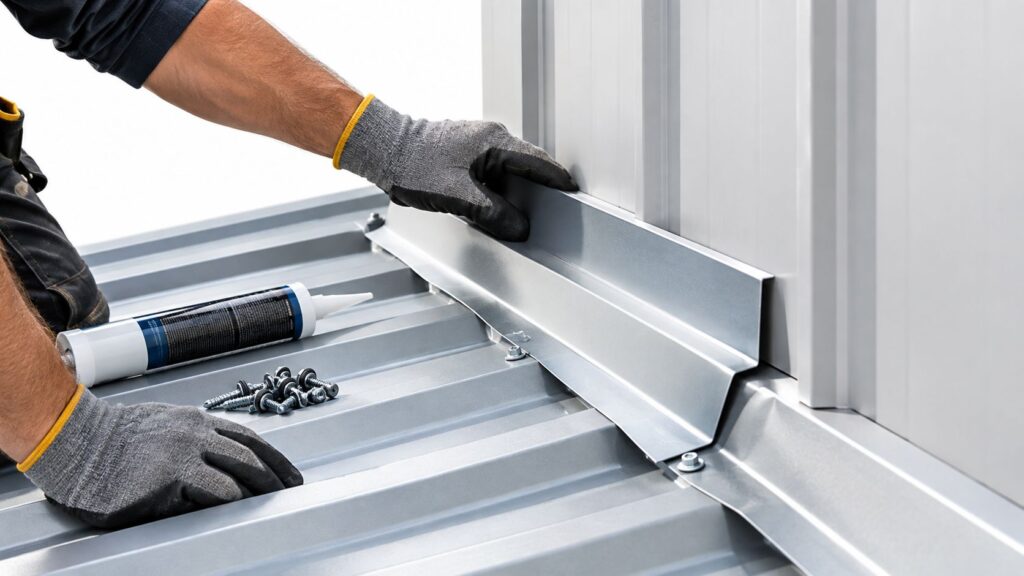
A roof valley is a reinforced waterproofing zone where two roof slopes meet, and Fort Worth code typically requires at least 11 inches of flashing coverage on each side for lower-slope roofs with a 1-inch splash diverter rib, plus 8 inches on each side and a 3/4-inch rib for steeper roofs. Those dimensions protect the concentrated drainage path from the roof deck to the gutter system.
You're on a Fort Worth reroof after a hard storm. The shingles look acceptable from the street, but the homeowner has a ceiling stain below the inside corner where two roof planes meet. The crew opens the area and finds a valley that was cut too tight, nailed through the drainage path, and installed without enough secondary membrane beneath it.
That kind of failure isn't unusual in DFW. A valley can look neat at completion and still be the first place wind-driven rain, debris, or concentrated runoff finds a weakness. The right roof flashing valley detail must account for the roof's geometry, the selected valley type, the underlayment assembly, the metal, and the local dimensional requirements.
Table of Contents
- Why Roof Valley Flashing Decisions Matter on DFW Jobsites
- What a Roof Valley Does and How Code Frames It
- Open Closed and Woven Valley Types Explained
- Metal Valley Flashing Installation Standards That Prevent Callbacks
- Valley Leak Causes Beyond Broken Flashing
- Choosing the Right Valley Strategy for DFW Roofs
Why Roof Valley Flashing Decisions Matter on DFW Jobsites
A valley decision affects more than the visible metal strip. It determines how shingles are cut, where fasteners can go, how much underlayment the crew needs, and how easily the finished roof will shed leaves and storm debris. On a house in Fort Worth, Benbrook, Haltom City, or another Mid-Cities location, that decision should be made before the crew starts laying field shingles.
Consider a common DFW roof with two slopes draining into one inside corner. One plane may send a relatively direct flow into the valley, while the adjoining plane pushes water across the intersection at a different angle. If the installer chooses a closed or woven detail without allowing for clean drainage, the valley can collect debris and force water beneath shingle edges. If the crew chooses an open-metal valley but fastens through its center, the visible channel becomes a line of penetrations in the highest-flow area.

The valley controls the rest of the assembly
The roof covering and valley detail have to work together. Asphalt shingles need consistent cuts and laps. Metal panels need compatible trim geometry and fastening that allows the assembly to drain without trapping water. Tile and other profiled coverings require a valley layout that accommodates their shape without leaving voids or creating a dam.
The local code dimension matters early, not during the final inspection. Fort Worth requirements call for wider flashing coverage on lower-slope conditions, along with a larger splash diverter rib at the flow line. A crew that orders narrow valley metal first may have to improvise on the roof, and field improvisation is where exposed fasteners, short laps, and uneven cuts appear.
Practical rule: Select the valley method from the roof plan, slope, covering, and drainage pattern. Don't let the material already sitting on the truck dictate the detail.
The core trade-offs are straightforward. Open valleys offer a visible, inspectable drainage channel. Closed-cut valleys provide a cleaner appearance but demand precise shingle alignment. Woven valleys can reduce cutting work, yet their layered construction can retain debris. Metal gauge, valley width, membrane backup, end laps, and local code dimensions decide whether any of those choices performs reliably.
What a Roof Valley Does and How Code Frames It
A DFW thunderstorm can send runoff from two roof planes into one narrow channel within minutes. That concentration exposes the valley to splashback, hydrostatic pressure, debris, and capillary movement at laps. The detail must function as a waterproofing assembly, not as a decorative strip covering the joint.
The roof covering determines how that assembly has to work. Asphalt shingles need consistent cuts, reliable laps, and a drainage path that does not expose nail heads. Metal panels require compatible trim geometry and fastening that lets the system move water without trapping it. Tile and other profiled coverings need a valley layout that follows their shape, closes voids, and prevents dams at the edges.
The IRC roof valley provisions commonly reference corrosion-resistant metal flashing at least No. 26 gauge, approximately 0.019 inches or 0.48 mm, with valley widths that vary by the roof assembly and applicable code language. Some model-code applications use a minimum 24-inch open-valley metal width, while self-adhered membrane beneath the metal may need to be 36 inches wide and centered under the valley.
Those requirements address different failure paths. A lower-slope valley can move water more slowly and keep it in contact with the assembly longer. A steeper valley moves runoff faster, which increases splash and edge loading. The metal must protect the centerline while leaving enough side coverage for the roofing material to integrate without forcing water beneath the courses.
Why the code measurements are performance details
- Material resistance: Corrosion-resistant metal withstands extended contact with water and compatible roofing materials.
- Secondary protection: A self-adhered membrane backs up the metal where a lap, cut, or fastener becomes vulnerable. Use a proper asphalt shingle underlayment system as part of that planned assembly, not as a patch after the metal is installed.
- End laps: Metal sections may require 4-inch end laps, with the upper piece shedding onto the lower piece.
- Side coverage: Required extension from the centerline changes with roof slope and local requirements. Confirm the applicable condition before fabrication.
- Flow control: Splash diverter ribs vary with the required valley coverage and help keep fast-moving runoff inside the channel.
Fort Worth's residential requirements make that local distinction important. The Fort Worth IRC valley requirements tie valley coverage and flow-line diverter geometry to the slope condition. Use the dimensional table provided elsewhere in the article, then verify each valley on the roof plan before ordering metal. A single house can contain different slopes, drainage patterns, and installation constraints.
The membrane cannot correct a narrow panel, poor end lap, exposed fastener, or misaligned shingle cut. Those decisions belong in the roof plan and material order, before the crew reaches the roof.
Flashing practice developed from informal field methods into standardized assemblies as galvanized steel and aluminum became widely available. Current code language carries that progression forward through corrosion resistance, approved lining methods, manufacturer instructions, and repeatable installation dimensions.
Open Closed and Woven Valley Types Explained
Valley type should follow the roof's exposure and the crew's ability to execute the detail consistently. In DFW, a clean-looking valley that sheds poorly is a bad trade for a visible channel that drains and can be inspected after a storm.
Open metal valleys
An open valley leaves a metal channel visible between the shingle courses. The installer cuts shingles back from the centerline, creates a defined drainage path, and integrates the side edges beneath the roofing courses. This arrangement makes debris easier to see and remove, and it gives the contractor a clear way to inspect the valley after wind-driven rain.
Open metal is often the strongest choice where heavy runoff, complex roof geometry, or difficult maintenance access makes drainage a priority. It also gives the crew more control over water movement than a shingle-only appearance. The trade-off is visual. The metal remains part of the finished roof, so the panel, rib, color, and cut lines need to look deliberate.
Open valleys fail when the installer treats the metal as a flat decoration. Center fasteners, inadequate side coverage, short laps, and shingle cuts that leave exposed nail heads can all create leak paths. Foot traffic can also deform unsupported metal, so the crew needs to stabilize the edges without blocking the channel.
Closed-cut valleys
A closed-cut valley keeps the metal out of sight by extending shingles from one plane across the valley and cutting the opposing courses along the drainage line. The finished roof has a continuous shingle appearance, which is often preferred on residential projects where the owner wants the valley to disappear.
This method can perform well when the shingle manufacturer permits it and the crew maintains straight cuts, adequate laps, and a continuous membrane beneath the valley. It is less forgiving of rushed layout. A crooked cut, inconsistent exposure, or poorly sealed edge can create a narrow point where water and debris collect.
Closed-cut valleys also make inspection less direct. The contractor can't see the full metal or membrane condition from the surface, so documentation of the underlying assembly and careful installation matter more.
Woven valleys
A woven valley interlaces shingles from both roof planes across the centerline. The approach can reduce cutting and produce a shingle-covered appearance, but it adds overlapping material in the same location where water is already concentrated.
Woven valleys are a poor match for every roof. They can be harder to keep flat, may retain leaves and sediment, and can create irregular shingle courses if the slopes or shingle dimensions don't cooperate. A crew should also verify that the roofing system and manufacturer instructions allow the method.
For DFW work, the practical comparison is this:
| Valley type | Main advantage | Main risk |
|---|---|---|
| Open metal | Clear drainage and easier inspection | Visible metal and exposed installation details |
| Closed-cut | Clean appearance | Cutting and alignment errors beneath the finished surface |
| Woven | Shingle-covered finish with less cutting | Debris buildup and layered irregularities |
Open metal is usually the better call when drainage certainty matters more than hiding the valley.
Metal Valley Flashing Installation Standards That Prevent Callbacks
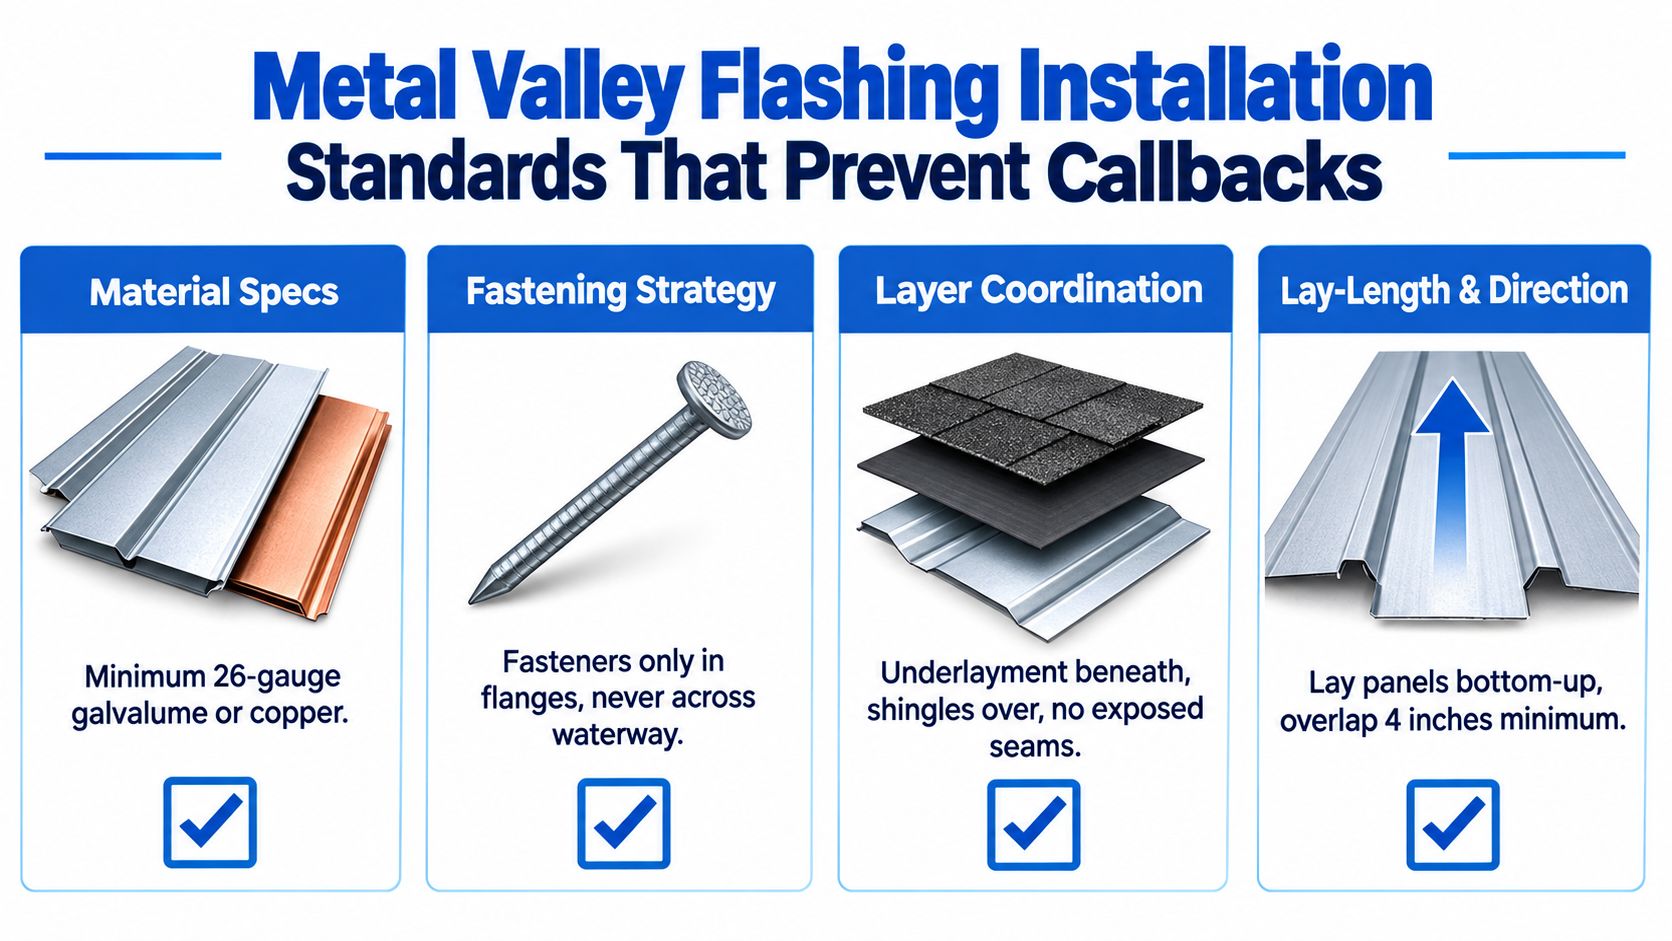
A reliable metal valley starts with material that can tolerate water exposure and remains stable under the roofing system. Modern code references commonly call for corrosion-resistant metal at least No. 26 gauge, approximately 0.019 inches or 0.48 mm. The crew should also confirm compatibility between the metal, fasteners, underlayment, sealants, and roof covering.
Begin with the substrate and membrane. The valley liner should run continuously along the full valley length. For a self-adhered membrane beneath metal, IRC 2024 guidance describes a minimum 36-inch-wide membrane centered on the valley, with 18 inches on each side before the shingles or metal are installed. The metal then becomes the durable drainage surface rather than the only defense against leakage.
Fasten the edges, not the waterway
The primary water path should remain uninterrupted. GAF's open-valley nailing guidance recommends placing valley-metal nails about 1 inch down and 1 inch in from each top corner edge, rather than driving fasteners through the center. This edge-fastening approach stabilizes the metal while preserving the drainage channel.
The exact metal profile and roof system may call for cleats, clips, or another restraint method. IBHS metal flashing guidance also emphasizes securing valley flashing with cleats, clips, or fasteners appropriate to the flashing dimensions. The goal is restraint without turning the waterway into a row of penetration points.
Coordinate laps and shingle coverage
Install valley panels from the lower end upward so upper pieces shed onto lower pieces. Maintain at least 4-inch end laps where required, and keep the lap direction consistent with water flow. A backwards or poorly supported lap can catch runoff even when the metal itself is corrosion-resistant.
Shingles must cover the fastener zone. GAF guidance calls for at least 6 inches of shingle overlap over the nail heads. Where the overlap is 4 inches to less than 6 inches, the metal edge and nail heads need to be stripped in with leak barrier to preserve the waterproofing.
A field check should focus on these points:
- Centerline: Keep the flow line open and free of exposed fasteners.
- Edges: Confirm the metal is secured near the upper corners or with approved clips.
- Laps: Verify the upper panel overlaps the lower panel in the drainage direction.
- Coverage: Check that shingle courses cover the nail heads and meet the planned side dimensions.
- Membrane: Look for continuous underlayment beneath the valley, with no unprotected deck showing at transitions.
The roof flashing tape selection should support the approved membrane and metal system rather than substitute for correct layout. Tape and leak barrier are useful for protecting vulnerable edges and insufficient overlap conditions, but they won't repair a valley that was undersized or fastened through the center.
A final inspection should happen before the crew leaves the roof. Check the valley from the eave upward, confirm that debris can move through the channel, and make sure no shingle corner, sealant bead, or fastener creates a dam.
Valley Leak Causes Beyond Broken Flashing
A valley leak doesn't always mean the metal has failed. Replacing the visible flashing without identifying the water source can leave the same callback waiting for the next storm.
Start with the flow pattern. Complex rooflines can send unequal volumes of water into opposite sides of the valley. Copper-industry detailing and independent guidance note that a baffle may be needed when higher-velocity water could push past the opposite edge of the flashing. That concern becomes more serious when a large watershed drains into a narrow valley or when the roof planes have noticeably different pitches.
Diagnose the whole drainage path
Debris can create a temporary dam that looks like a flashing defect. Leaves, small branches, roofing granules, and sediment hold moisture against shingle edges and restrict the exit path. In DFW neighborhoods, a valley may be clean at installation and blocked after storms or seasonal leaf fall.
Sealant deterioration causes a different type of trouble. Sealant can crack, separate, or collect dirt at a seam, but adding another bead over the top rarely restores a properly lapped assembly. Shingle misalignment is also easy to miss. A cut that leaves a gap, a course that doesn't cover the intended fastening zone, or a lifted edge can divert water under the covering.
Use the interior evidence carefully. A ceiling stain below the valley identifies a wet area, not necessarily the exact entry point. Water may travel along the deck, underlayment, or framing before it appears indoors.
A flashing replacement is only a solution when the flashing is the cause. Clear the path, trace the water, and inspect the layers before ordering a new panel.
Account for seasonal conditions
Freeze-related problems can complicate diagnosis even though DFW isn't a northern climate. Guidance describes valley leaks caused by snowmelt infiltration in a cold-region case where adding heat tape to the lower half of the valley addressed the underlying condition. The lesson applies beyond that particular climate: when water refreezes, blocks the outlet, or moves behind a covering, new metal alone may not solve the problem.
The same system view helps with storm repairs:
- Runoff capacity: Check whether the valley width and edge control suit the amount and direction of water entering it.
- Debris management: Remove buildup and verify that the lower valley can discharge freely.
- Material movement: Look for displaced metal, lifted edges, and distorted sections caused by traffic or weather.
- Shingle condition: Inspect cuts, laps, granule loss, and alignment on both sides.
- Adjacent transitions: A leak near a valley can originate at a wall, dormer, or roof-to-wall junction, so use a roof flashing detail for wall intersections when the water path leads away from the valley.
This approach prevents a common waste of labor. The crew doesn't just swap a strip of metal, reseal the visible seam, and hope the next storm provides a different result.
Choosing the Right Valley Strategy for DFW Roofs
For most DFW residential decisions, start with exposure and drainage rather than appearance. An open metal valley is a strong choice when the roof receives concentrated runoff, the valley is difficult to maintain, or the project has complex slopes. A closed-cut valley suits a clean architectural finish when the crew can maintain precise cuts and the roofing system allows that assembly. A woven valley should be reserved for compatible systems where the crew can keep the interlaced courses flat and the owner accepts more involved debris maintenance.
Material planning must follow the local dimensions. Fort Worth's requirements distinguish between lower-slope and steeper conditions, with 11-inch coverage and a 1-inch splash diverter rib for the lower-slope requirement, and 8-inch coverage with a 3/4-inch rib for the steeper condition, as detailed in the Fort Worth residential code reference. Confirm those dimensions before ordering panels, membrane, clips, and compatible fasteners.
A local building-materials distributor can also reduce jobsite interruptions when the valley requires a specific metal profile, membrane, or trim component. Contractors serving Fort Worth, Benbrook, Haltom City, and nearby Mid-Cities locations can plan around stocked roofing materials, jobsite-direct delivery, and same-day fulfillment for orders placed by noon. Trade-account support and coordinated exterior material sourcing can help keep the valley package aligned with the rest of the roof scope.
The best roof flashing valley is the one that matches the drainage pattern, complies with the local dimensions, and can be installed without shortcuts. Order the complete assembly, inspect the fastening path, and document the concealed membrane before the shingles hide the work.
Blue Lake Roofing Supply provides installer-grade roofing materials, valley metal, underlayments, flashing components, and jobsite-direct delivery across the DFW area. For materials that match your valley design and local installation requirements, visit Blue Lake Roofing Supply and contact the team before your next Fort Worth, Benbrook, Haltom City, or Mid-Cities project.