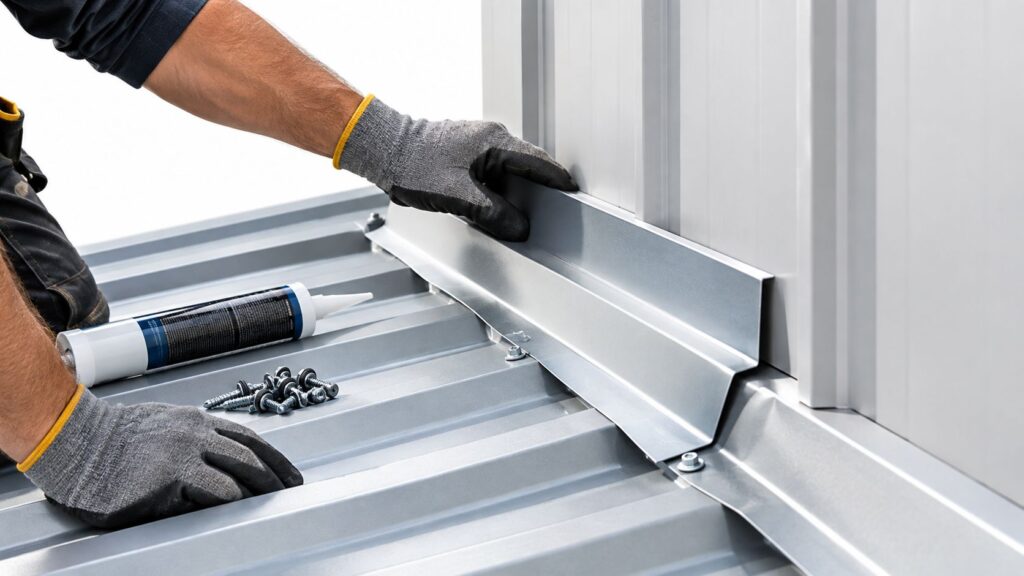
A shingle crew can finish a roof in Fort Worth or Arlington, clean the jobsite, and still leave a leak waiting at the outside corner. The callback often arrives after the first hard storm, when water stains appear near a window or along an interior wall. The shingles may be installed correctly. The failure is frequently the folded corner, the step-flashing lap, or the way the roof flashing connects to the wall weather barrier.
Roof flashing corners take concentrated runoff, movement between different materials, and wind-driven rain at the same time. A reliable detail has to shed water continuously from the roof covering to the flashing, then away from the wall cladding. Sealant on an exposed face can't replace that drainage path.
Table of Contents
- Why Roof Flashing Corners Need Special Attention in DFW
- Choosing the Right Metal for Roof Flashing Corners
- Forming and Installing Roof Flashing Corner Details
- Integrating Corner Flashing with Adjacent Components
- Common Roof Flashing Corner Failures and Prevention
- Repairing Damaged Corner Flashing on Existing Homes
- Final Inspection Checklist for Roof Flashing Corners
Why Roof Flashing Corners Need Special Attention in DFW
A new roof in Mansfield can pass a quick visual check and still have a corner detail that fails during the next wind-driven storm. On repair calls in Fort Worth and Arlington, the visible metal is often intact, while water has found a path behind the wall cladding or below a short lap. The repair starts by tracing the drainage route, not by adding sealant.
The 2018 International Residential Code requires flashing where roof geometry changes and where roofing meets another surface. That covers roof-to-wall intersections, openings and penetrations, valleys, ridges, inside corners, outside corners, and wall-to-eave transitions. For metal flashing, the code calls for corrosion-resistant material at least 0.019 inch thick, equivalent to No. 26 galvanized sheet steel (IRC roof flashing requirements).
That baseline matters across Fort Worth, Arlington, Mansfield, Saginaw, Forest Hill, and South Dallas. A corner joins two roof planes, a wall, underlayment, siding, and sometimes a gutter. Those parts must pass water in sequence. A short layer, reversed lap, or blocked outlet can send runoff behind the finished metal.
Start with the drainage path
For new construction, mark the water route before forming the corner. Runoff should leave the roof covering, cross the flashing, and discharge away from the wall. At a roof-to-wall termination, kick-out flashing needs to direct that flow into the gutter or clear of the cladding. On a repair, verify the existing wall barrier and step flashing before fitting replacement metal, because a new corner cannot correct a hidden upstream break.
DFW wind exposure raises the cost of rushed folds and loose fasteners. Wind-driven rain can reach seams that remain dry in ordinary showers, and turbulence at a corner can shift poorly restrained metal. Low-slope commercial work adds membrane corners, coping, fascia, and perimeter flashing, so the repair detail must match the roof system and its exposure.
Practical rule: Treat every corner as a connection between three drainage systems, the roof covering, the flashing, and the wall weather barrier.
Use compatible materials and accurate geometry. Keep fasteners covered, laps pointed down-slope, and the corner tied into step flashing, underlayment, and kick-out discharge. These practices suit residential asphalt-shingle work and can guide light commercial repairs, subject to manufacturer instructions, adopted local code, and project-specific approvals.
Choosing the Right Metal for Roof Flashing Corners
On a DFW roof, the corner material has to do more than cover a joint. It must hold a clean fold, stay compatible with the surrounding assembly, and keep water moving from the roof, across the flashing, and away from the wall. A choice that works on a new shingle installation may fail on a repair where old step flashing, wall cladding, or fasteners limit the available detail.
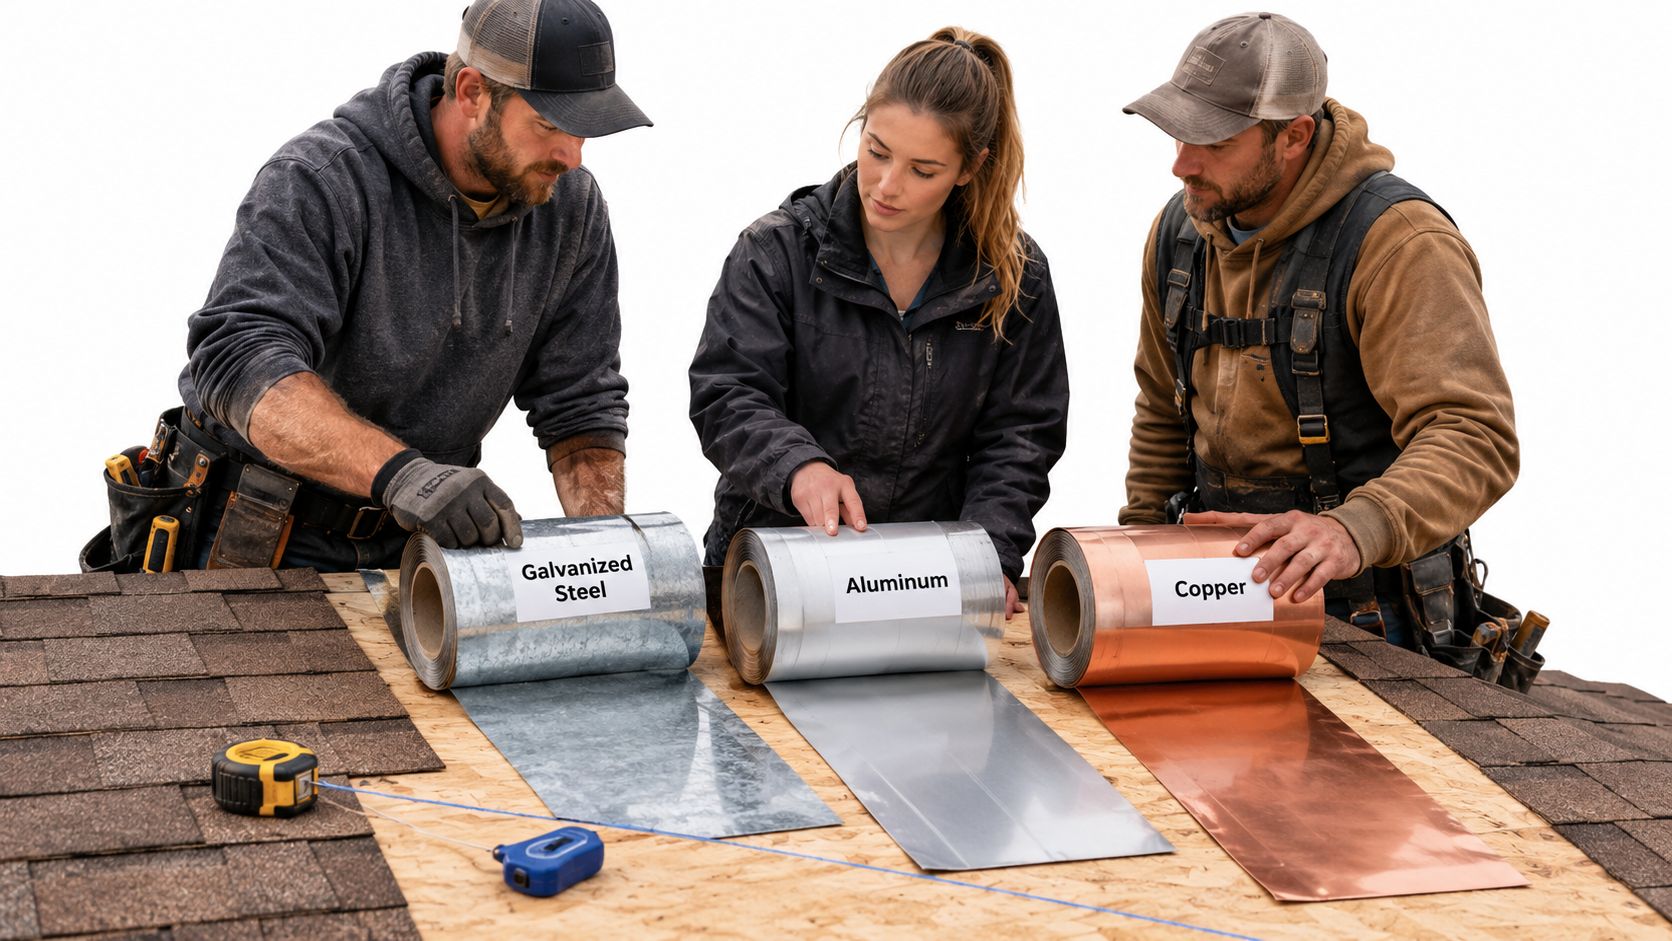
Galvanized steel is a practical choice for shingle flashing because it has useful stiffness and forms a durable bend when the sheet is not too thin. Aluminum is lighter and easier to cut, but it needs protection from incompatible contact and can distort during fastening. Copper forms readily and can provide long service, though it requires planning around adjacent metals, fasteners, and the finished roof's appearance.
The applicable code benchmark for metal flashing is 0.019 inch, or No. 26 galvanized sheet steel (IRC material guidance). Thin stock may kink during cutting, deform under a nail, or lose its crisp fold as a crew works it around an outside corner. Select material stiff enough to hold its shape, but workable enough for a controlled bend at the brake or workbench.
Match the metal to the assembly
Check the roof covering or panel system, underlayment, fasteners, wall cladding, and existing flashing before loading the brake. The corner is part of the drainage assembly, not an isolated strip of metal.
- Galvanized steel: Use it where stiffness, paint compatibility, and resistance to jobsite handling damage matter. Account for cut edges and coating damage, particularly on exposed commercial details.
- Aluminum: It is easy to handle and form, but requires isolation from incompatible metals and damaging contact with masonry. Avoid excessive fastening pressure, which can crush or distort the corner.
- Copper: Use it where the project is designed around copper details. Do not pair it casually with galvanized steel or aluminum fasteners. Moisture bridging dissimilar metals can cause galvanic corrosion.
- Panel-specific trim: Standing-seam and exposed-fastener roofs often require trim shaped for the panel profile. Generic bent metal can interfere with clips, seams, or movement allowances.
For metal roof work, the Insurance Institute for Business & Home Safety recommends laps of at least 2 inches on vertical faces and at least 6 inches where water must be shed, including valley-like conditions (IBHS metal flashing guidance). Hemmed or stiffened edges help resist distortion. Cleats or clips can restrain exposed flashing faces that are 4 inches or wider when face fasteners are not used.
DFW crews working on asphalt shingles, TPO, EPDM, and standing-seam panels should match the corner detail to the roof system and local wind exposure. A residential repair may require compatibility with existing metal, while new construction allows the wall and roof interfaces to be planned together. Material from zinc metal roofing panels suppliers may require different trim and compatibility decisions than standard galvanized details. In Tarrant County and across the Metroplex, choose by assembly and exposure, not price alone.
Forming and Installing Roof Flashing Corner Details
A roof-to-wall corner in a DFW neighborhood can look tight from the ground and still leak after the first wind-driven storm. The roof sheds water, the flashing redirects it, and the wall must stay outside that drainage path. The corner detail has to keep all three working together on both new construction and repairs.
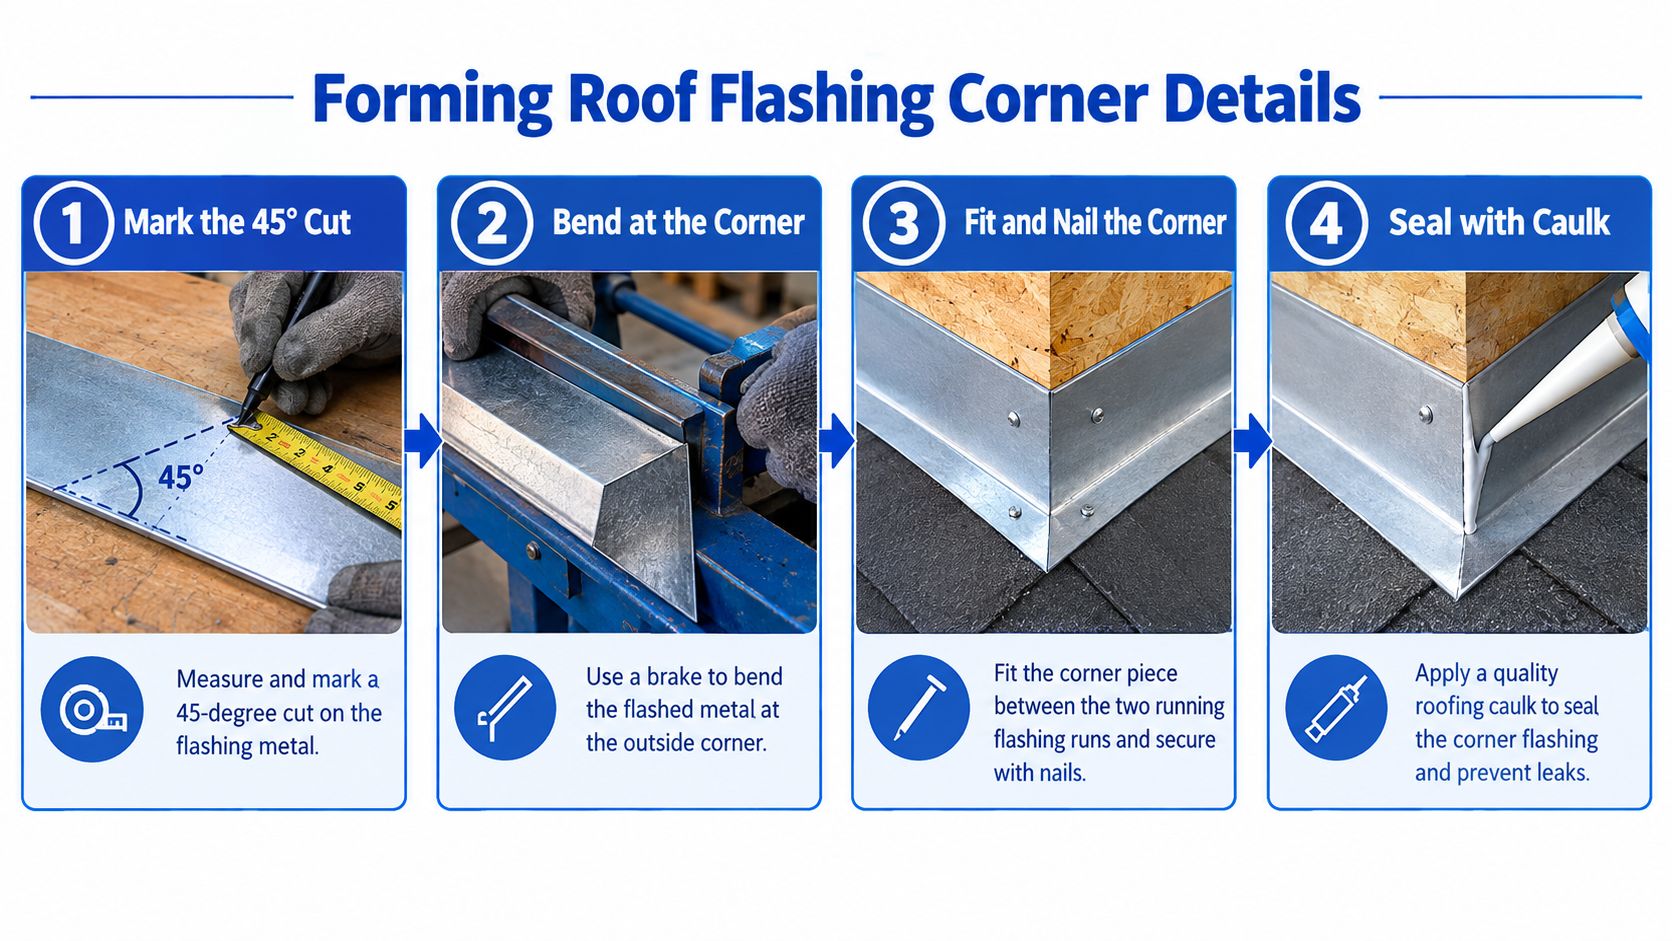
Form the outside corner on the brake or workbench before it reaches the roof. Measure the wall leg and roof leg, mark the center fold, then make a 45-degree cut from the outside corner toward the center fold. Remove the triangular piece and bend the remaining metal tightly around the corner. The relief cut lets the metal wrap without buckling. A shallow or oversized cut leaves an open seam or removes the metal needed to keep water outside the wall line.
Build the outside corner into the courses
For an asphalt-shingle roof, set the detail in this order:
- Extend the wall underlayment behind the flashing area.
- Set the base shingle course so the corner piece lies flat on the shingle and rises on the wall.
- Place the formed corner flashing with at least 8 inches above the shingles, following the roof flashing installation sequence.
- Fasten the upper portion with two nails, one on each side, where later flashing and shingle courses will cover them.
- Install the next step-flashing piece over the corner piece. Keep the overlap at least 3 inches, and place the fastener high enough to disappear beneath the next shingle course, as shown in this outside-corner flashing method.
- Alternate each step piece and shingle course while moving upslope.
Surface caulk is not a substitute for correct laps, folds, or concealed fasteners. Sealant can serve inside a specified overlap, but exposed face nails, reverse laps, and a corner fold held together only by caulk usually lead to callbacks.
Handle inside corners and valleys differently
An inside corner or valley receives runoff from two roof planes. Give the detail enough width for the flow and enough lap to prevent water from reaching the sheathing. Under 2021 IRC provisions, valley flashing must use corrosion-resistant No. 26 gauge metal, be at least 0.019 inch or 0.5 millimeter thick, extend at least 11 inches from the valley centerline on each side, and have a minimum 4-inch end lap. The valley flashing must be at least 15 inches wide, with a splash-diverter rib at least 1 inch high at the flow line (2021 IRC valley flashing provisions).
Do not end a valley at a wall corner without tracing the discharge path. On a repair, check the existing wall and roof layers before fitting new metal. On new construction, set the corner so concentrated runoff can reach the gutter or leave the wall face. DFW wind exposure makes loose upper edges and poorly covered fasteners especially vulnerable.
Use this roof flashing against a wall guide to confirm the wall-side installation sequence.
Integrating Corner Flashing with Adjacent Components
A corner leak on a DFW roof often starts several feet away from the visible stain. Wind-driven rain can enter where the wall barrier, flashing, and shingle courses meet, then travel sideways before reaching the ceiling. The roof must shed water onto the flashing, the flashing must keep it outside the wall, and the wall assembly must provide a path for any water above to drain outward.
On new construction, set that drainage sequence before siding and shingles hide the work. Extend the wall underlayment or weather barrier behind the flashing, then install the base shingle course, corner piece, and step flashing so each upper layer overlaps the layer below. On repairs, expose enough of the assembly to identify the existing water path. A new corner piece placed over trapped siding or a blocked wall leg will not correct the problem.
Each step-flashing unit must be covered by the next shingle course. The Florida step-flashing application standard describes pieces 3 inches longer than the shingle exposure, with a 5-inch vertical leg, a 5-inch horizontal leg, and a minimum 3-inch head lap between units. DFW jurisdictions may use different code language, so confirm the adopted local requirement and the shingle manufacturer's instructions before treating those dimensions as the project standard.
Keep every transition in the drainage plane
At an outside corner, start the step-flashing run over the formed corner in the direction that sends water downslope. At an inside corner or valley, keep the valley metal open and free of shingle scraps or sealant that can obstruct flow. At a wall termination, install kick-out flashing so it receives the step-flashing discharge and directs water away from the wall. This matters on exposed DFW elevations, where wind can drive runoff behind a short or poorly seated transition.
Sealant has a limited role. Use a compatible product in concealed laps or at specified penetrations. Do not spread an exposed bead over an incorrect fold and call the joint sealed. FEMA's flashing guidance advises against sealing house wrap to flashing when water entering higher on the wall must drain outward at the wall base.
Choose asphalt shingle underlayment selection that supports the same continuous drainage path as the metal work. Before closing the wall, verify that the wall leg remains behind the weather barrier and is not trapped by an unbroken siding edge. On a repair, run water above the corner and watch the discharge path from the roof to the flashing and then away from the wall.
Common Roof Flashing Corner Failures and Prevention
A corner leak in a new build or reroof often appears after the first hard storm. Once the siding or shingle edge is opened, the cause is usually visible: an exposed nail, a wall leg that ends too soon, or a lap turned uphill. These defects interrupt the three-way drainage path between the roof, flashing, and wall. The repair must correct that path, not just cover the stain inside.
What fails on DFW roofs
Exposed face nails can corrode and create a direct hole through the metal. Place fasteners high enough for the next shingle course or trim layer to cover them. Before leaving the roof, inspect the finished corner from below and from the side.
Short wall legs leave water with no reliable metal surface outside the wall assembly. For vertical sidewalls, Georgia residential code describes base or step flashing at least 4 inches high and 4 inches wide, arranged to direct water away from the wall and onto the roof or into the gutter (Georgia flashing requirement). Treat that dimension as an inspection baseline, then confirm the code adopted for the DFW project and the manufacturer's installation requirements.
Reverse laps direct runoff toward the wall instead of downslope. Each upper piece must cover the lower piece in the direction water travels. A corner can look neatly folded and still leak if the overlap sends water behind the cladding.
Poorly seated folds open as metal, shingles, siding, and sheathing shift at different rates. Caulk may hide the gap for a short time, but it cannot replace the formed shape, proper overlap, or mechanical attachment. On repairs, remove enough material to see whether the fold is sound before applying sealant.
In exposed areas near Saginaw or Mansfield, wind can lift loose edges and stress lightly fastened corners. The IBHS metal flashing guidance recommends attention to fixing at building corners and warns against over-tightened screws, incompatible metals, and fasteners placed where water can collect. Those details matter on both new construction and older homes with replacement siding.
Walk the detail before billing
Use a roofside inspection before closing the scope:
- Look from below: Confirm there are no face nails, open cuts, lifted edges, or visible gaps through the fold.
- Run a straightedge: Check that both legs sit flat against the adjoining surfaces.
- Trace the lap: Follow runoff downslope and confirm every overlap faces the correct direction.
- Check fasteners: Verify washers are seated without crushing the metal, and keep fasteners out of drainage paths.
- Inspect the discharge: Confirm the corner sends water to the gutter or away from the cladding.
- Review adjacent materials: Check the metal, fasteners, panels, and wall components for incompatible-metal contact.
A corner has passed only when its formed, lapped, and fastened layers continue directing water outward after roof and wall materials move. Fresh sealant can make a failed connection look finished, but it cannot repair a bad drainage path.
Repairing Damaged Corner Flashing on Existing Homes
A reroof callback in Forest Hill, South Dallas, or another DFW neighborhood often begins with a request to “seal the corner.” That may solve a small puncture when the surrounding layers remain sound. It will not solve a failed three-way drainage connection between the roof, flashing, and wall behind the siding.
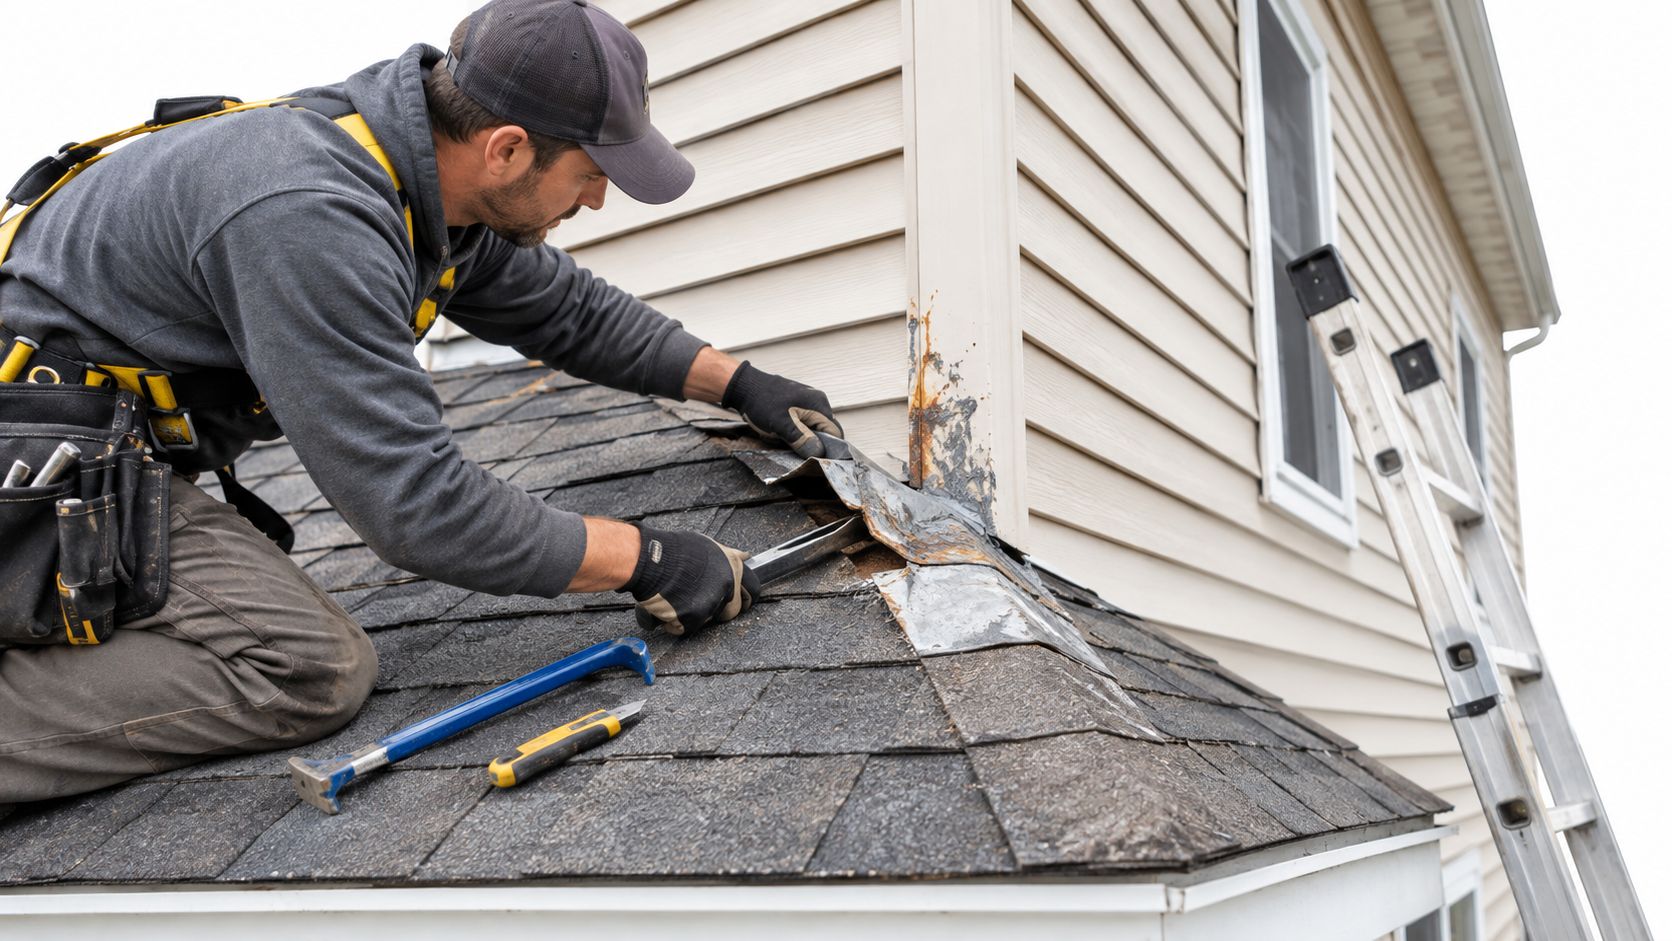
Start by removing enough siding and wall sheathing to see the full assembly. Check for rot, insect damage, stained sheathing, compressed insulation, and a weather barrier that was cut away or never integrated. In older homes, replacement siding may hide a short wall leg, a missing kick-out, or flashing installed over intact cladding. Set the repair boundary around the damaged assembly, not around the visible edge of the caulk.
Rebuild the connection in the right order
The Pacific Northwest National Laboratory's Building America guidance gives a practical sequence for existing roof-to-wall repairs. Extend a transition membrane from the roof sheathing onto the wall, run underlayment at least 8 inches up the wall, integrate the new kick-out and step flashing with the shingles, and lap the existing house wrap over the flashing (existing-home roof-wall flashing guidance).
Keep the siding at least 1.5 inches above the shingles so water can exit instead of remaining trapped against the cladding. In wind-exposed areas around Mansfield, Saginaw, and open parts of the Metroplex, secure the corner without putting fasteners through drainage paths or relying on sealant to hold loose metal. Confirm the finished repair meets applicable local code, manufacturer instructions, and the project's wind requirements.
Use this repair sequence:
- Remove enough siding and shingles to expose the corner and inspect the sheathing.
- Replace damaged sheathing or framing before closing the wall.
- Install the transition membrane from the roof sheathing onto the wall.
- Run underlayment up the wall and behind the new flashing.
- Form and install the corner piece, step flashing, and kick-out in the correct overlap order.
- Lap the existing house wrap over the flashing while preserving outward drainage.
- Reinstall the siding with the required clearance, then trace the discharge path into the gutter or away from the wall.
Know when a patch is appropriate
A localized sealant repair can suit a sound, properly lapped corner with one small puncture or a failed concealed seal. It cannot correct a reverse lap, missing kick-out, short wall leg, rotted sheathing, or flashing installed without integration behind the siding.
Avoid sealing every upper flashing edge. Water entering higher on the wall needs a route outward at the base. Sealant that closes the house wrap to the flashing can trap that water inside the wall assembly. The completed repair should make the roof, flashing, and wall drain together, not merely make the visible joint look airtight.
Final Inspection Checklist for Roof Flashing Corners
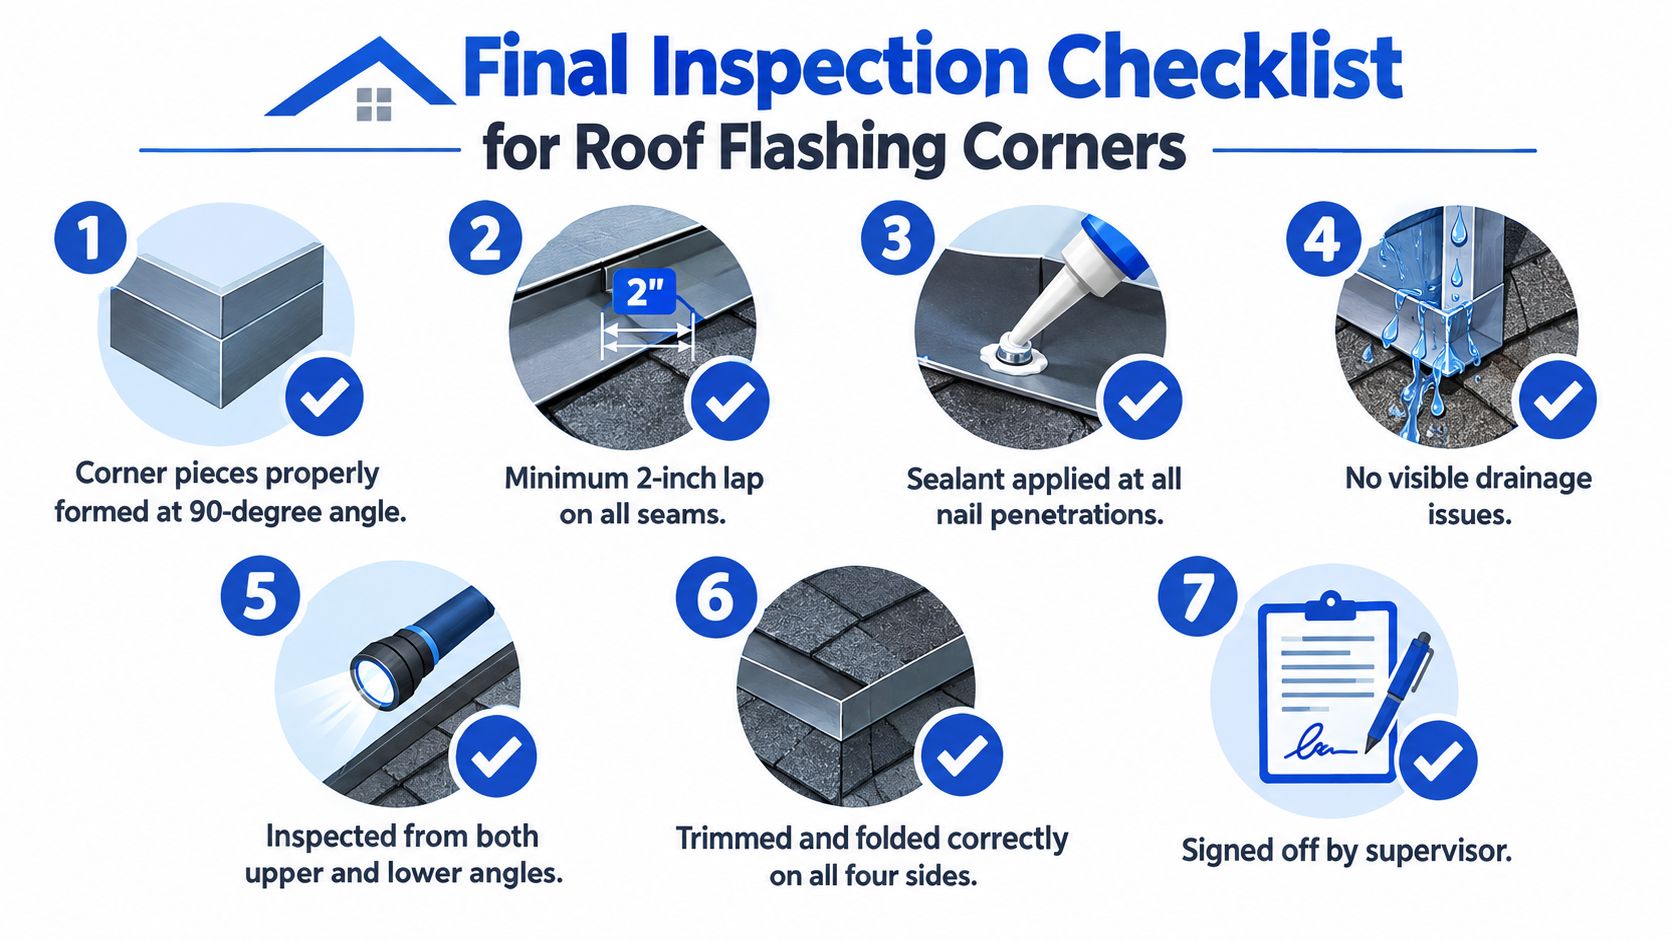
A corner in Fort Worth, Arlington, Forest Hill, or another DFW neighborhood can look finished from the driveway while water still bypasses the flashing. Inspect the roof, metal, and wall as one drainage system. Confirm runoff leaves the roof, crosses the flashing, and exits at the wall without entering the sheathing.
Use the checklist at the roof edge, then repeat the visual checks from the ground:
- Forming: Confirm the outside corner has a clean 45-degree relief cut and a tight bend without a torn flap.
- Dimensions: Verify both legs meet the applicable code, manufacturer, and project requirements. For vertical sidewalls, the Georgia flashing requirement gives 4 inches high and 4 inches wide as a functional baseline.
- Coverage: Check that the corner extends at least 8 inches above the shingles where the roof flashing installation sequence applies.
- Laps: Follow every joint downslope. Confirm successive pieces overlap by at least 3 inches where the outside-corner flashing method specifies that lap.
- Fasteners: Check that nails or screws are high, covered, properly seated, and clear of pooling water. Look for exposed washers, loose heads, or crushed metal.
- Drainage: Verify the valley, step flashing, and kick-out remain open. Trace runoff into the gutter or away from the wall, especially on wind-exposed DFW elevations.
- Wall interface: Confirm underlayment and house wrap overlap the flashing in the drainage direction. Keep siding at least 1.5 inches above the shingles where the existing-home roof-wall flashing guidance applies.
Photograph the formed corner, covered fasteners, laps, kick-out, and wall clearance before the crew leaves. Record the metal specification and compatible fasteners in the project file for the inspector or warranty reviewer. Blue Lake Roofing Supply provides roofing, siding, underlayment, metal-roof components, counter flashing, valley metal, and jobsite-direct delivery from its Forest Hill yard to surrounding DFW locations, including same-day fulfillment for qualifying orders placed by noon.
A sound corner has a formed, mechanically secured drainage path. Caulk should not substitute for correct overlap, wall integration, or a clear discharge route.
Blue Lake Roofing Supply offers installer-grade roofing and flashing materials for shingle, metal, and commercial systems, with jobsite-direct delivery across DFW. Visit Blue Lake Roofing Supply to source materials before the next corner detail becomes a callback.