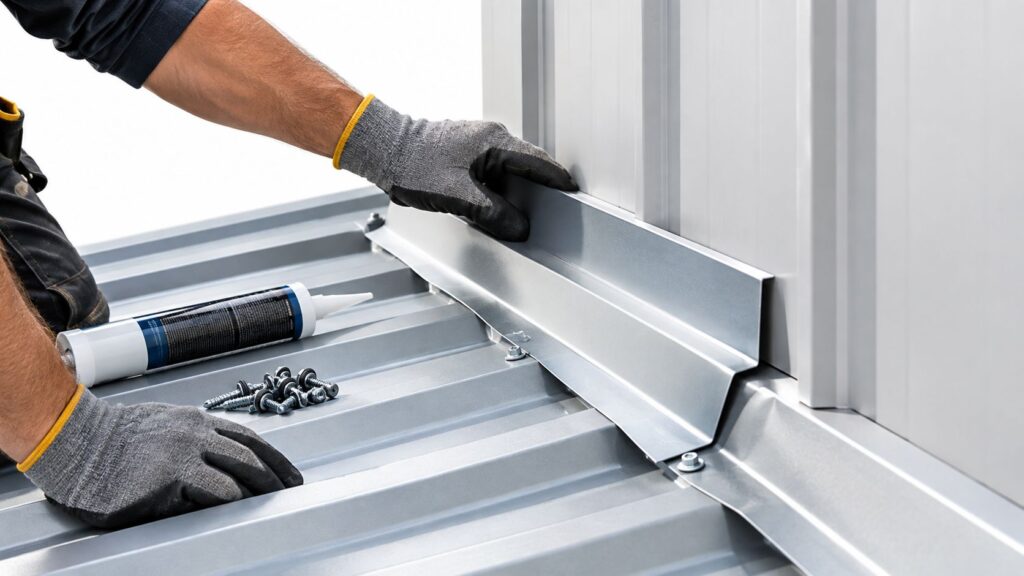
You can tell how a fiber cement job is going to go before the first plank comes off the truck. If the crew shows up in Fort Worth, Arlington, Benbrook, or Mansfield with stacked boards, a half-planned trim package, and nobody has walked the wall, the project is already leaning toward callbacks. Fiber cement siding installation in North Texas works when the wall, the flashing, the fasteners, and the trim all behave like one drainage system, not a pile of separate trades.
The Dallas-Fort Worth heat, the hard wind, and the sudden rain cycles punish shortcuts fast. A clean-looking elevation can still fail if the substrate is wrong, the water-resistive barrier is patched badly, or the crew treats caulk as a substitute for flashing. The right sequence keeps the wall dry, keeps the boards stable, and keeps your foreman from chasing leaks after drywall and paint have buried the evidence.
Table of Contents
- Why Fiber Cement Siding Installation Starts Long Before the First Board
- Pre-Cladding Planning for DFW Siding Projects
- Substrate Prep and Weather-Resistive Barrier Continuity
- Layout, Fastening, and the Course by Course Installation Rhythm
- Flashing and Trim Transitions on DFW Mixed Material Jobs
- Cutting Stations and Crew Dust Control in North Texas Weather
- Pre Close Inspection and Field Quality Control
Why Fiber Cement Siding Installation Starts Long Before the First Board
A foreman who thinks siding starts at the starter strip is already behind. In Fort Worth and the surrounding DFW market, the job starts when the wall is still open, because the assembly underneath the siding decides whether the finished exterior sheds water or traps it. Fiber cement is durable, but it is still only the outer layer of a water-management system.
Read the wall, not just the plan
Walk the framing first. Check that the sheathing is where it should be, the weather-resistive barrier is continuous, and the openings are already detailed correctly before anyone reaches for the nailer. Public-sector specs treat that as the minimum order of operations, and they're right.
That also means you don't let a crew “work around it” in the field. If the window installer hasn't flashed the opening, or if a remodel in Arlington has missing WRB behind old cladding, the siding crew does not cover it and hope for the best. That's how a small defect turns into concealed damage later.
The siding is not the drainage plane. It's the outer layer that depends on the drainage plane doing its job first.
Think in systems, not in bundles
The material package has to match the wall package. For a DFW contractor, that means compatible flashing, corrosion-resistant fasteners, trim, and sealants, not just boards on a pallet. The wrong assumption is that one trim detail or one fastener pattern works everywhere. It doesn't.
If you're pulling product for a job in Fort Worth, Arlington, Benbrook, or Mansfield, line up the siding, trim, soffit, and jobsite delivery window together. A materials source such as Blue Lake Roofing Supply siding materials can be part of that coordination, but the point is the same no matter where you buy, the wall package has to be complete before production starts.
Pre-Cladding Planning for DFW Siding Projects
Most bad siding days start in the office, not on the wall. The builder thinks the profile is decided, the color is picked, and the crew can improvise the rest. Then the truck arrives in Mansfield or Benbrook and somebody discovers the trim package doesn't match the window detail, or the flashing type doesn't fit the transition.
Lock the decisions before demo closes
The elevations need to be read line by line. Confirm the profile, the reveal, soffit transitions, and how the siding dies into windows, doors, corners, and masonry. If those decisions aren't fixed, the crew ends up stopping work to solve finish details with open walls and a clock running.
This is also where your procurement discipline matters. Fasteners need to be counted with the specific product in mind, not guessed. Trim bundles need to be checked against the field conditions. Z-flashing and L-flashing are not interchangeable, and the project should tell you which one belongs where.
Set the delivery and ownership chain
On a DFW job, the schedule breaks when material shows up too late or in the wrong sequence. Someone has to own the delivery window, the drop location, and the order in which the package lands at the site. Jobsite-direct delivery inside the Forest Hill dispatch area can keep the trade moving when the order is staged properly and placed on time.
Use the pre-flight list below with your project manager before demo wraps:
- Confirm the profile and reveal. The crew needs the exact siding layout before it cuts a single board.
- Match trim to openings. Window, door, and corner trim have to fit the wall geometry, not force it.
- Verify flashing selections. Roof-to-wall, masonry, and trim transitions need the right metal before installation starts.
- Count fastening and sealant needs. Don't discover shortages after the starter strip is already down.
- Schedule the drop by elevation. Keep the staging sequence aligned with the install sequence, or the site clogs fast.
The practical rule is simple. If the wall package is incomplete, the siding crew is not ready.
Substrate Prep and Weather-Resistive Barrier Continuity
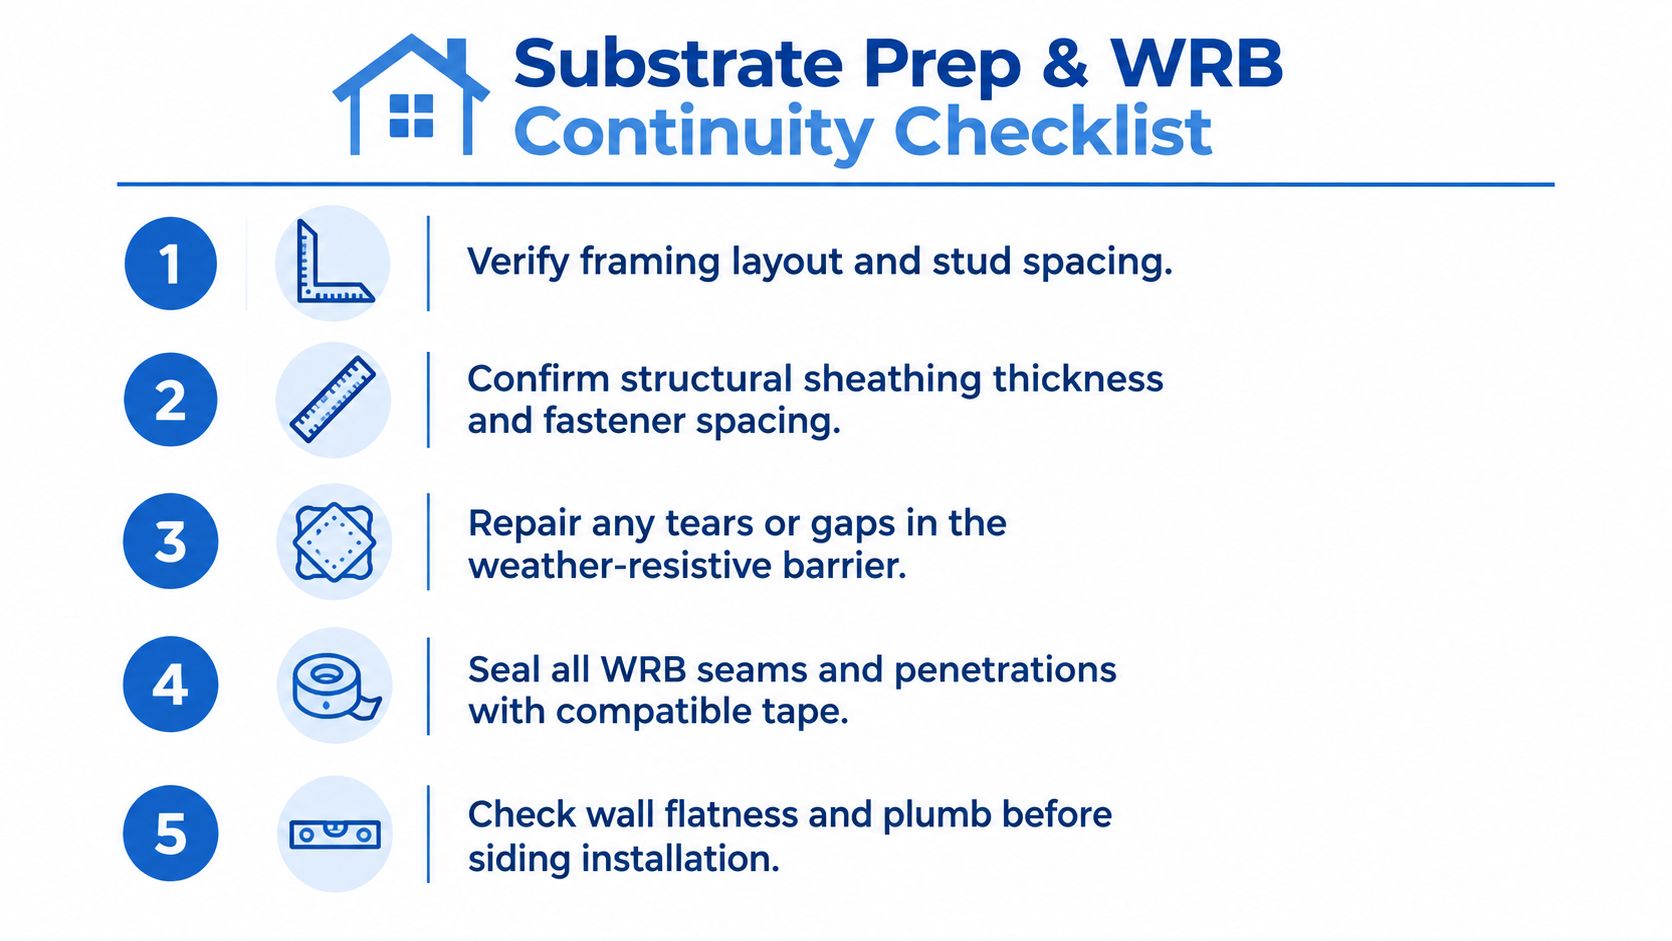
This is the part crews skip when they're in a hurry, and it's the part that bites them later. Before the first board goes up, the wall has to be straight, dry, and continuous from framing to barrier to flashing. If that chain is broken, the siding can look fine and still fail underneath.
Verify the wall before you cover it
Start with framing layout and sheathing. Some systems call for framing no more than 16 inches on center and minimum 7/16-inch structural sheathing, because the siding depends on the wall behind it, not just the face you can see. If the substrate is weak, uneven, or damaged, the cladding doesn't get a stable load path.
Then inspect the weather-resistive barrier for tears, punctures, and bad laps. Repair those defects before cladding starts. A gap hidden behind siding is still a gap, and wind-driven rain in North Texas will find it faster than a late crew can.
Flash the openings in the right order
Windows, doors, chimneys, and other penetrations need flashing before the siding covers them. That order matters. If the opening details aren't right, the siding crew is left trying to protect a failed joint with finish work, and finish work is not the same thing as water management.
Confirm the wall is dry before the starter strip goes up. A wet wall trapped behind fiber cement is asking for trouble. In remodel work around Fort Worth and Arlington, old cladding often comes off to reveal missing WRB or patchy repairs, and that's the point where the foreman has to stop the schedule and fix the assembly.
If you can't prove the wall is ready, you're not ready to hide it.
Layout, Fastening, and the Course by Course Installation Rhythm
Once the wall is ready, the work turns into rhythm. Fiber cement goes up from the bottom, course by course, and the crew's job is to keep every board within its movement space and fastening zone. If the rhythm gets sloppy, the board line drifts, corners crack, and the callbacks start.
Start with the strip and keep the overlap honest
A starter strip is commonly set at about 0.25 inch thick. That small dimension matters because it sets the first reveal and keeps the lower course aligned with the rest of the wall. If the base is off, every course above it inherits the problem.
Horizontal panel systems may also call for metal Z-flashing with a 0.25-inch gap at panel joints. Don't treat that gap as cosmetic. It helps the wall move and drain the way the system expects.
Nail for the product, not for habit
Fasteners have to follow the product's written instructions and the applicable wind-load data, not a generic crew habit. Typical lap-siding guidance calls for a non-corrosive fastener to penetrate at least 1.25 inches into framing, with 6d nails generally used over standard wood sheathing and 8d nails sometimes required when sheathing exceeds 1 inch. Fasteners should sit at least 0.25 inch from board edges, and many panel systems want fasteners about 3/8 inch from the edge and at least 2 inches from corners, driven perpendicular with the head snug, not buried.
Use blind nailing where the product permits it. That's cleaner and better protected, but only if the approved spacing and fastening pattern still match the evaluation report or wind-load table. Don't invent a pattern because it “looks right.”
Keep joints where the manufacturer wants them
Joint placement is part of the load path. One federal specification says butt joints should not occur within 4 inches of a stud, and board ends meeting vertical trim are often separated by at least 0.125 inch to handle movement and allow sealant where permitted. Those aren't cosmetic tolerances, they're controls that help prevent cracking and edge damage.
| Common Fiber Cement Fastening Minimums | ||
|---|---|---|
| Control | Minimum | Why It Matters |
| Fastener penetration into framing | 1.25 inches | Helps preserve holding power and wind resistance |
| Fastener distance from board edge | 0.25 inch | Reduces edge splitting and breakout |
| Fastener distance from corners in some panel systems | 2 inches | Protects corners from cracking |
| Fastener distance from plank ends in some systems | 2 inches | Limits end damage and loose edges |
| Butt joints from stud in one federal spec | 4 inches | Keeps joints off a weak support point |
Flashing and Trim Transitions on DFW Mixed Material Jobs
A lot of DFW work goes sideways here. A remodel in Fort Worth or Arlington often ties new fiber cement into old brick, stone, or stucco, and somebody wants to solve the whole transition with sealant. That shortcut works until the first hard rain and then it becomes a leak path.
Treat every transition as a water detail
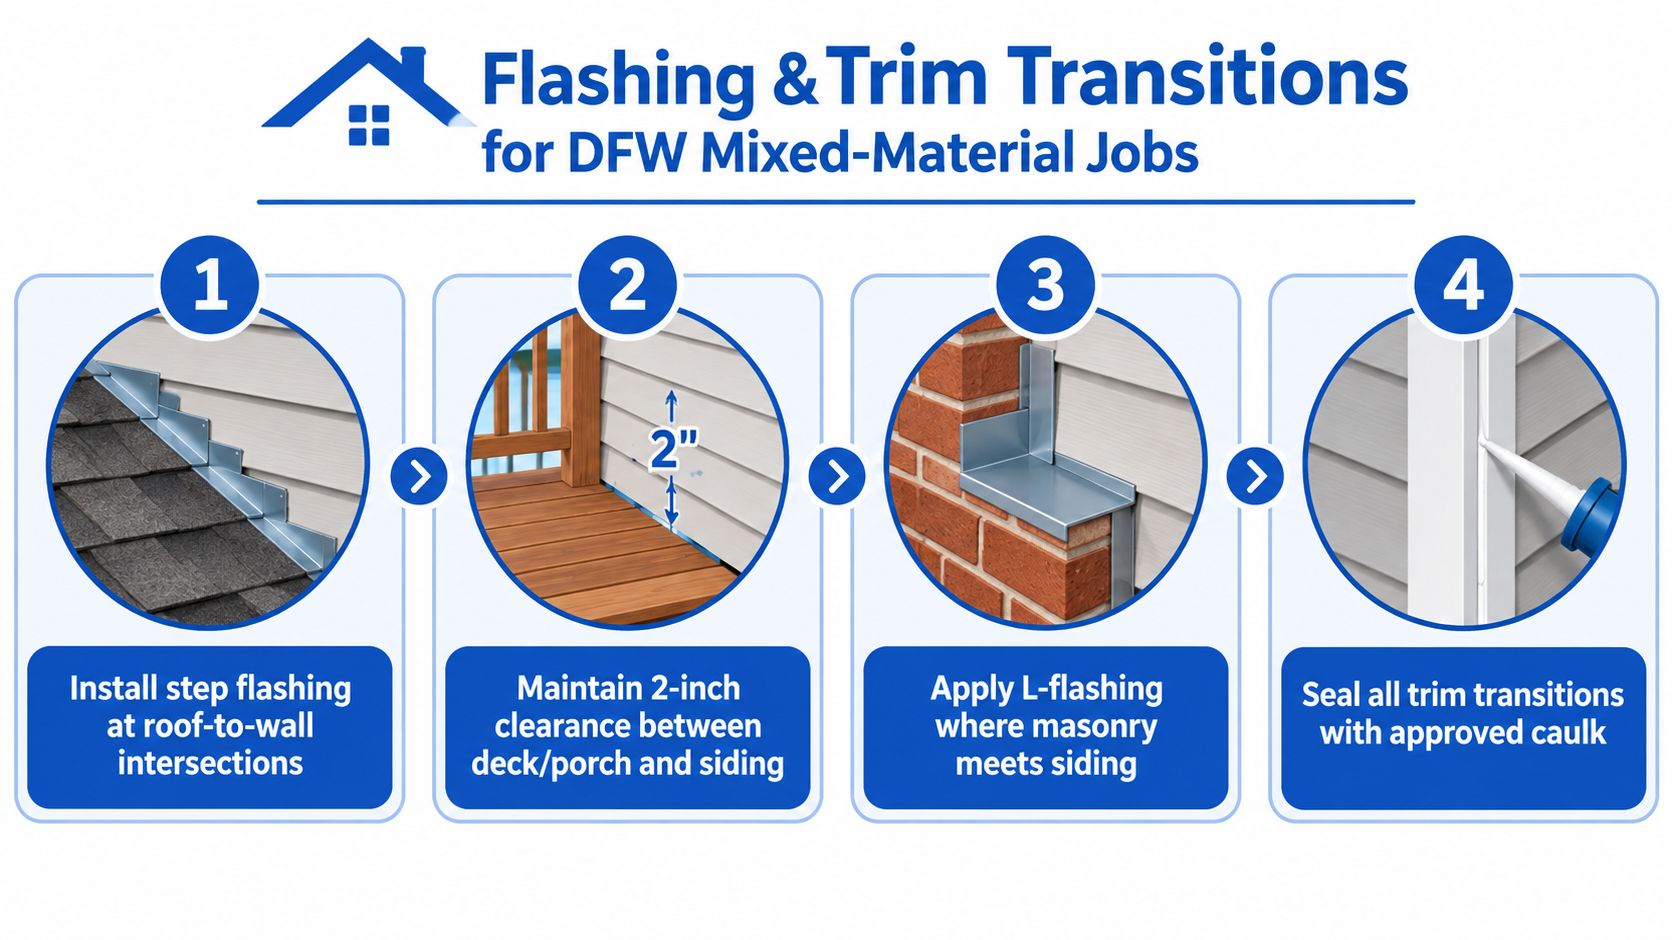
Roof-to-wall intersections need compatible step flashing and, where specified, self-healing membrane. The siding should never be the thing trying to stop water at that joint. Keep the path open so water can move out, not back into the wall.
At decks, porches, paths, driveways, and finished grade, hold the clearance the manufacturer calls for. One installation guide specifies at least 2 inches above those surfaces, and siding trim should stay at least 6 inches above finished grade or concrete. That clearance protects the lower edge from splashback and trapped moisture, which is exactly what North Texas storms throw at the base of a wall.
Don't cheat the masonry transition
When siding meets brick, stone, stucco, or block, use L-flashing and maintain the specified gap. Allura's manual calls for a minimum 1/8-inch gap at vertical terminations, including windows, doors, trim, corners, and penetrations, and the same minimum clearance where siding meets masonry flashing. That gap isn't there for looks. It gives the assembly room to move and room for sealant if the manufacturer allows it.
Sealant belongs where the manufacturer permits it, not where the crew ran out of flashing. That's the difference between a controlled joint and a patch.
For roof-to-wall detailing, the reference roof flashing installation guide is a useful companion when a job ties siding into a wall-plane transition. Keep the details disciplined, or the first norther will show you exactly where the gap is.
Cutting Stations and Crew Dust Control in North Texas Weather
The cutting station is the part of the job that gets treated like an afterthought, and it shouldn't. Dust from cutting and drilling fiber cement isn't a nuisance to wave off, it's a control problem you have to manage on purpose. On a breezy day in the Metroplex, a sloppy station pushes dust across the lot, into other trades, and toward neighboring properties.

Set the station before the blade spins
Put the cutting area away from bystanders and away from the prevailing wind when you can. Use dust collection on the tool, connect it to a HEPA-filtered collector, and make one person responsible for checking the hose, the airflow, and the filter condition before work starts. Dry sweeping just throws the problem back into the air.
Historical exposure measurements for uncontrolled fiber-cement cutting ranged from 0.02 to 0.27 mg/m³, and an eight-hour exposure reached 0.17 mg/m³, which is up to 3.4 times the NIOSH recommended exposure limit of 0.05 mg/m³. CDC exposure data is why this needs a protocol, not a shrug.
Build the routine around the work, not the weather
A normal DFW morning can start calm and turn into moving air by lunch. That means your crew can't rely on “we're outside” as the control measure. The cut line, the saw setup, the cleanup method, and the respirator choice all have to work together.
- Designate one cutting station. Keep it consistent so the crew doesn't improvise every day.
- Control the dust at the tool. Collection at the source beats chasing debris after it spreads.
- Keep cleanup wet or captured. Dry sweeping is the wrong move.
- Brief the crew and document it. A written protocol belongs in the job safety binder.
- Separate cutting from installation traffic. That keeps the dust plume away from finish work.
The respiratory concern is mainly tied to cutting, drilling, sanding, and abrasion. Ordinary occupancy after proper installation is a different issue. Don't mix the two, because the control measures are not the same.
Pre Close Inspection and Field Quality Control
Crews that treat inspection as cleanup usually pay for it later. The pre-close walk is production control, because once the siding is covered, the only record left is what the wall got.
Inspect while the wall is still open
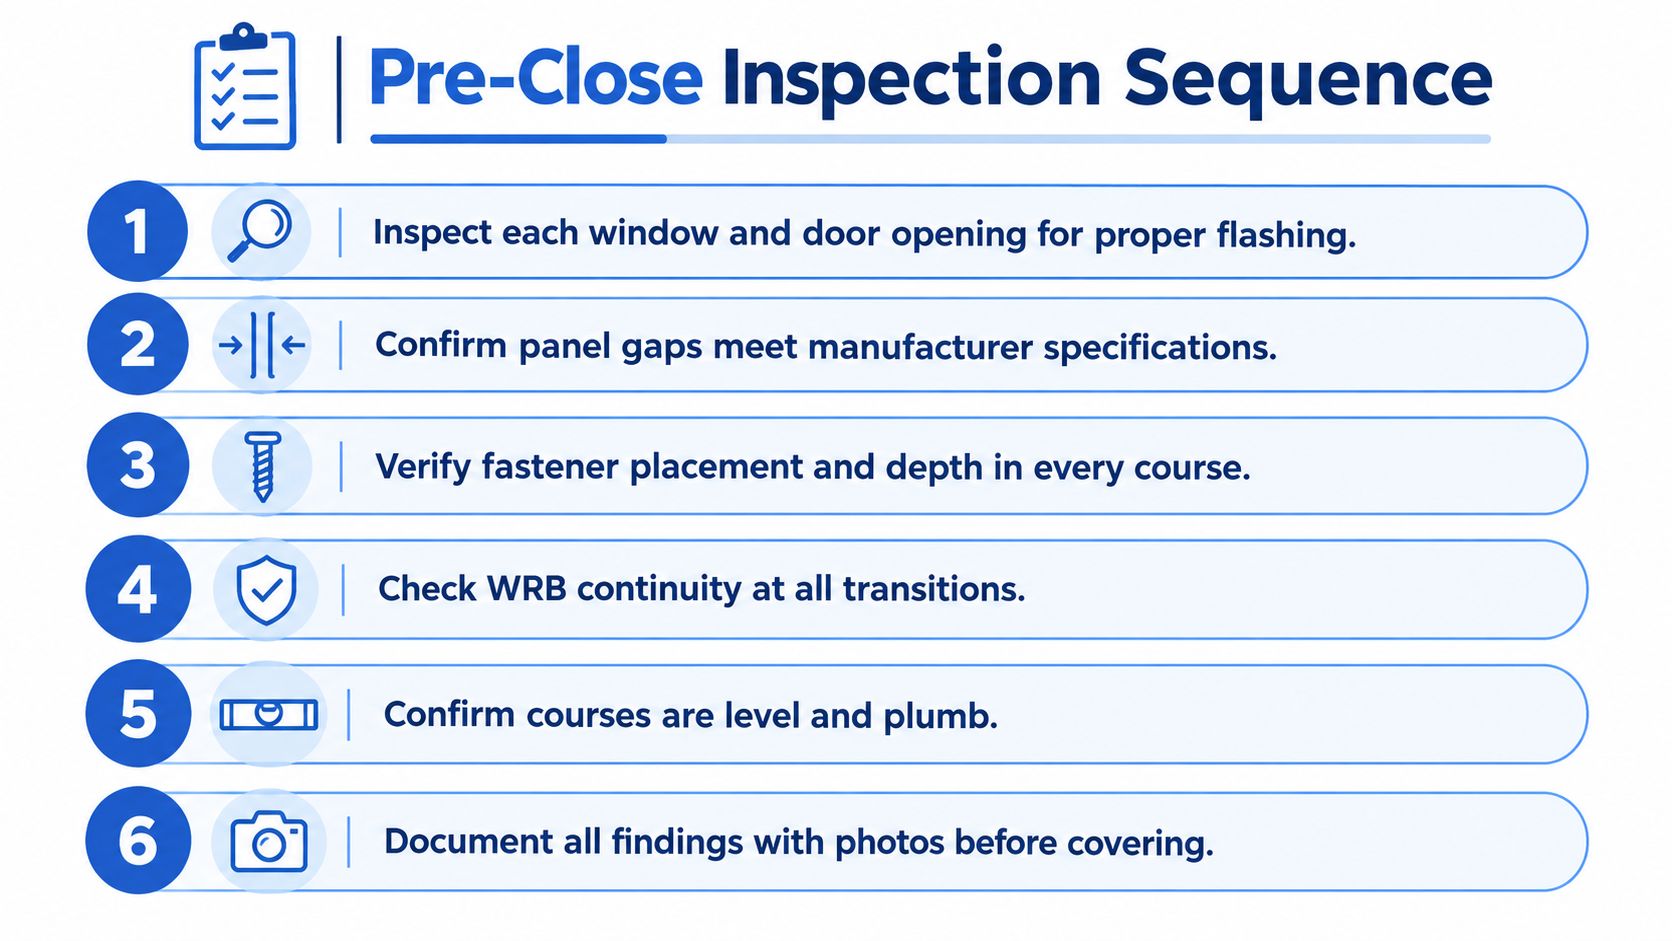
Walk every opening before the crew closes it. Windows, doors, roof-to-wall intersections, and mixed-material transitions all need to be checked while the framing and detailing are still exposed. Confirm that the flashing is present, continuous, and tucked in the way the system expects, because a flashing piece hidden behind finished siding becomes a leak call, not a punch-list item.
Check the panel gaps course by course. Fiber cement needs the manufacturer's specified movement space at joints and terminations, and that spacing should be verified before the wall gets shut in. Fasteners belong in the approved zones, driven straight, and set without over-driving that can telegraph through the finish or compromise the hold.
Photograph the hidden work
Document the concealed details before they disappear. Take photos of WRB repairs, flashing at penetrations, the starter strip, and fastener placement where it is still visible. That record helps when a warranty question comes up, when a builder wants sign-off, and when another trade swears the opening was never detailed correctly.
Practical rule: if you would not stand behind the fix with the wall still open, do not cover it yet.
Run the pre-close conversation in one pass
Before the crew leaves a Fort Worth, Arlington, or Benbrook jobsite, the lead should run the same sequence every time. Substrate ready, flashing confirmed, fastener kit checked, sealant kit on hand, cutting station signed off, and delivery timing set for the next material pull. A trade account can help centralize those pulls, and coordinating with your guttering and siding suppliers near you keeps exterior packages arriving from one dispatch point.
That matters on mixed-material jobs where siding, trim, windows, and related exterior parts all have to arrive in the right order. Blue Lake Roofing Supply can help keep those materials moving without forcing the crew to guess what shows up next. Inspection protects the schedule because it catches the miss before the wall gets closed and the rework starts.